
Heavy equipment jobs
How to Rebuild a Hydraulic Cylinder
- 3 h
- Intermediate
- 8 steps
- 8 tools
- 3 parts
Snap yours and Mechy redraws these steps for it. First guide free, no sign-up.
Sample guide. A heavy-equipment mechanic hasn't reviewed this one yet, so search engines don't index it. Follow your machine's manual where they differ.
Short answer
Remove the leaking cylinder safely, drain and clamp it, pull the rod, replace every seal in the kit, check rod and bore, reassemble to the manual torque, refit, bleed and leak-test. Bent rods and scored bores go to a shop.
Safety first
Mechanic jobDo these before step 1.
- DANGERLockout/tagout: implement on the ground, engine off, key out, isolator off, tag on controls. Never work under a load held only by hydraulics.
- DANGERRelieve trapped and accumulator pressure and mind load-holding valves before opening any line. Escaping oil can inject through skin.
- DANGERNever feel for leaks by hand. Use cardboard; an injection injury needs a hospital at once.
- WARNINGSupport the cylinder with a rated sling, crane or cribbing before the pins come out. It can swing or drop.
- WARNINGHot oil burns. Let the system cool and cap every hose and port at once.
- WARNINGRod and piston assemblies are heavy. Support them when pulling and fitting; keep fingers out of pinch points.
- WARNINGWear eye protection and gloves. Keep people clear of the implement during the test.
- NOTICEAll torques come from the OEM manual or kit sheet. Do not guess.
Stop and call a pro or the dealer if
- The rod is bent, deeply scored or pitted through the chrome: send it to a hydraulic shop for regrind or replacement.
- The bore is scored or out of round, or the barrel is bulged or cracked: it is a shop job.
- The cylinder still leaks after reseal, or the kit does not match the cylinder.
Mechy's guides help, but they don't replace the maker's manual, your training or your site's rules. If something doesn't match what you see, stop and check.
Tools
Tick what you have. In the app, Mechy ticks the ones it can see in your photos.
Parts and supplies
- 1×Cylinder seal kitAll seals, wiper, O-rings and backups; match the OEM or kit numberCheck before you buy
- 1×Clean hydraulic oilPer the machine manual, for lubricating seals and topping upCheck before you buy
- 1×Thread lockerOnly if the manual calls for it on the piston nut or set screwCheck before you buy Size chart
Steps
-
Step 1 of 8
Lower, relieve pressure, lock out and support
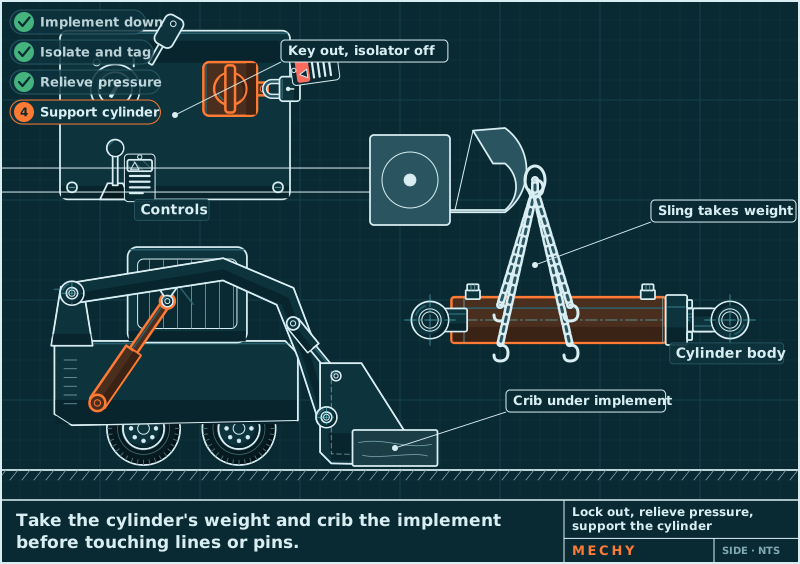
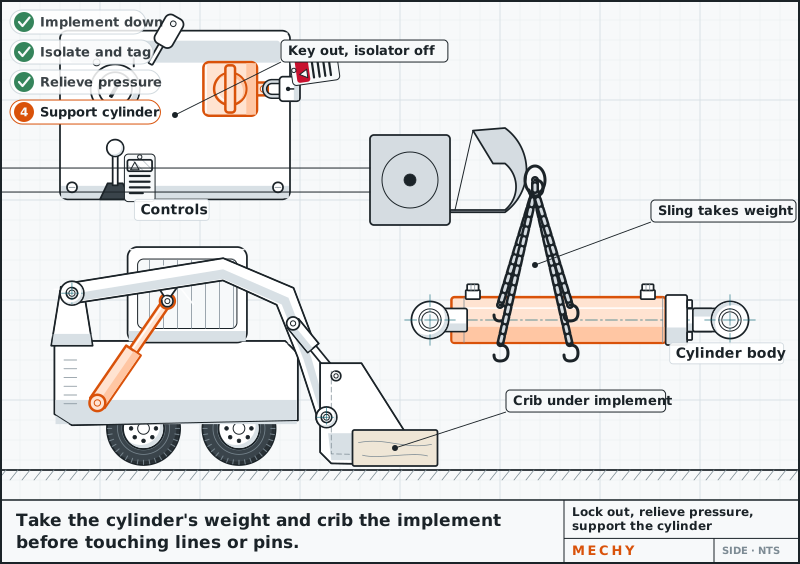
Lower the implement to the ground and stop the engine. With the engine off (key on if the pilot controls need it), work the levers through their range to dump trapped pressure. Then key out, isolator off, tag on controls. Take the cylinder's weight with a sling or cribbing before touching a line or pin.
Never work under anything held only by hydraulics.
Sling, crane or hoist, cribbing
-
Step 2 of 8
Disconnect lines, cap them and remove the cylinder
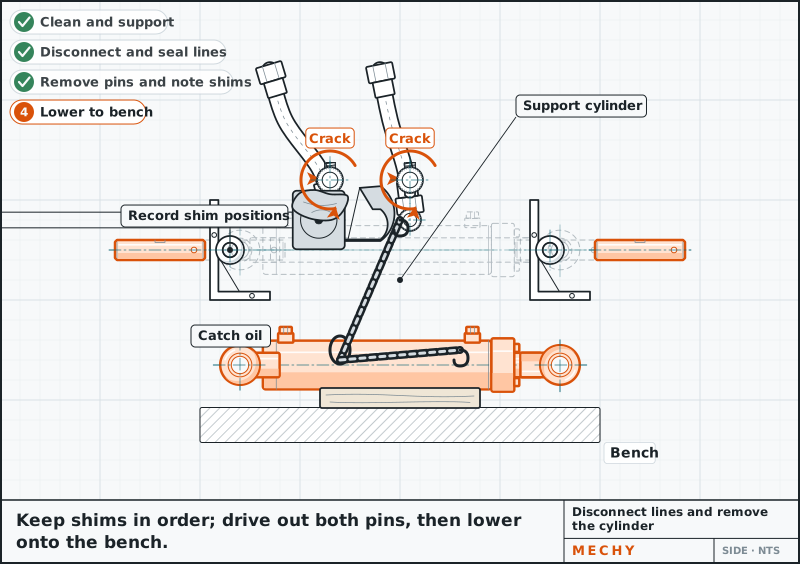
Clean around the fittings. Crack each hose over a pan, then cap hoses and plug ports straight away. Mark shims and positions, knock out the pins and lower the cylinder to the bench.
Hose caps and plugs, drain pan, cardboard, Sling, crane or hoist, cribbing
-
Step 3 of 8
Drain it and clamp the barrel
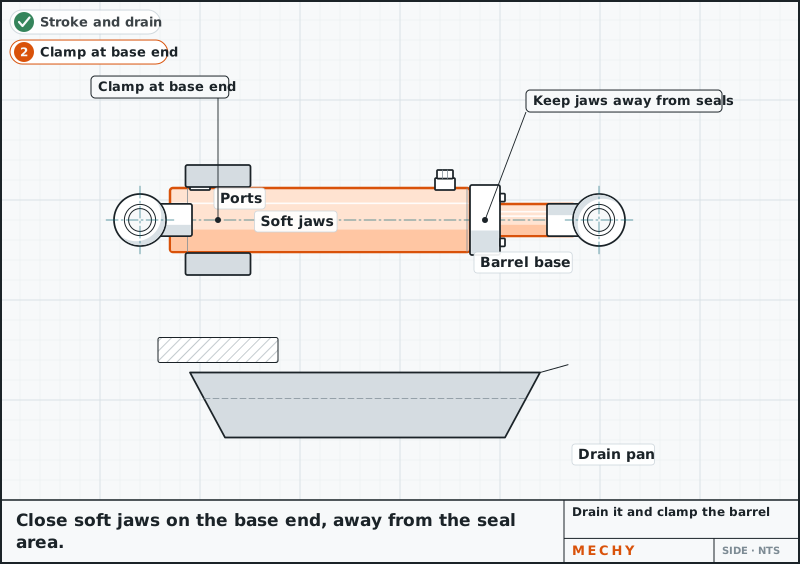
Drain oil from both ports into the pan, working the rod slowly by hand and keeping fingers clear of the eye. Clamp the barrel in the holding clamp or soft-jawed vise at the base end, away from the gland and seals.
Cylinder holding clamp or bench vise with soft jaws
-
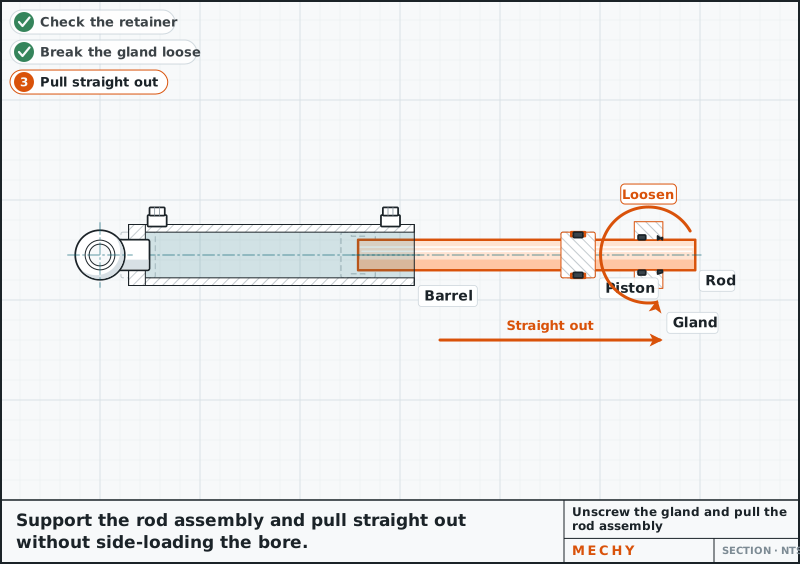
Step 4 of 8
Unscrew the gland and pull the rod assembly
Fit the spanner wrench and break the gland loose counter-clockwise. If it has a retaining or snap ring, release that first. Pull the rod, piston and gland out straight, supporting the weight, with no side load on the bore.
Pull straight. Cocking the piston scores the bore.
Spanner wrench or gland tool
-
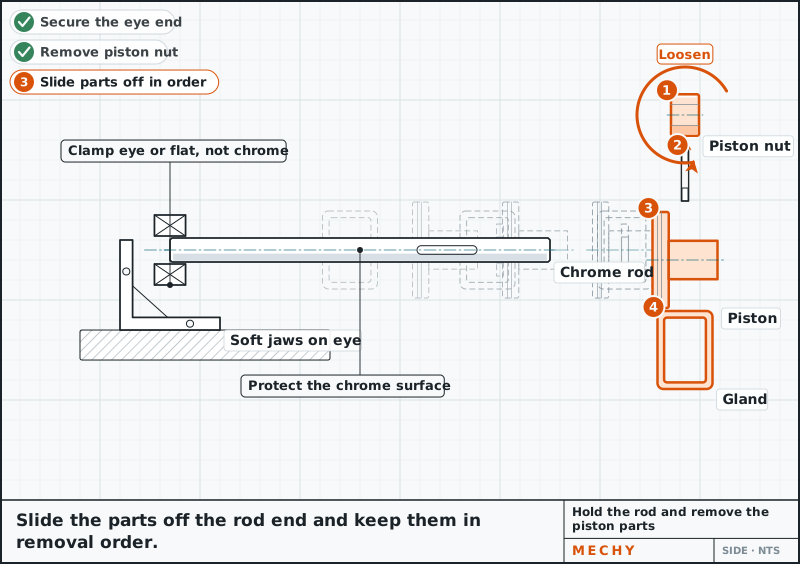
Step 5 of 8
Hold the rod and remove the piston nut and parts
Clamp the rod in a rod clamp or soft jaws at the eye end or a flat, never on the chrome. Check for a set screw, lock or staking, then break the nut loose and slide off piston, spacers and gland in order.
Rod clamp or soft jaws, Torque wrench, breaker bar and sockets
-
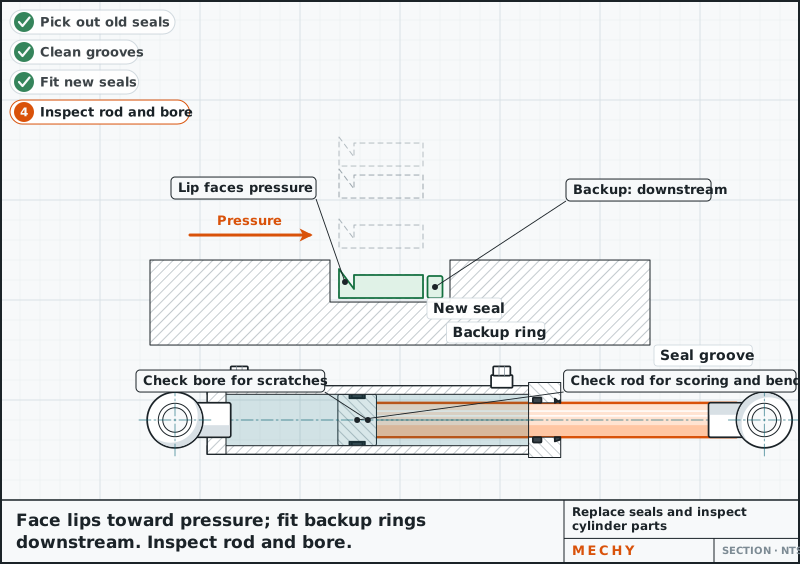
Step 6 of 8
Replace every seal and inspect parts
Pick out all seals, wear rings, O-rings and backup rings. Clean the grooves. Fit new ones matching the old orientation and the kit sheet: backup ring on the low-pressure side, wiper lip facing out. Check rod for scoring and bend, bore for scratches.
No sharp tools on groove faces. Use plastic tools.
Seal picks and plastic seal tools, Straightedge, micrometer, bore light
-
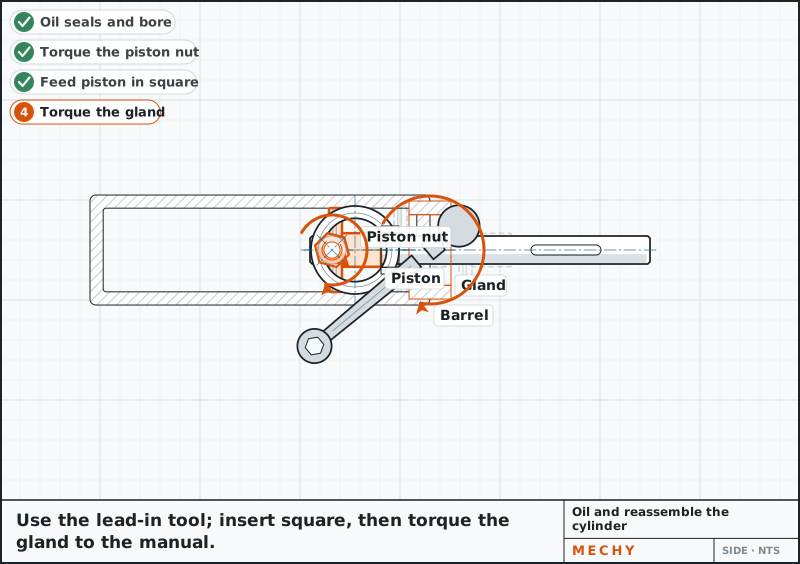
Step 7 of 8
Reassemble with oil and torque the nut and gland
Oil all seals and the bore. Fit gland, piston and spacers on the rod in order, clamp the rod, and torque the piston nut to the manual. Feed the piston into the barrel square with a lead-in tool, then tighten the gland to the manual torque.
Piston nut and gland torque: Per OEM manual Check it against your manual.
Torque wrench, breaker bar and sockets, Spanner wrench or gland tool
-
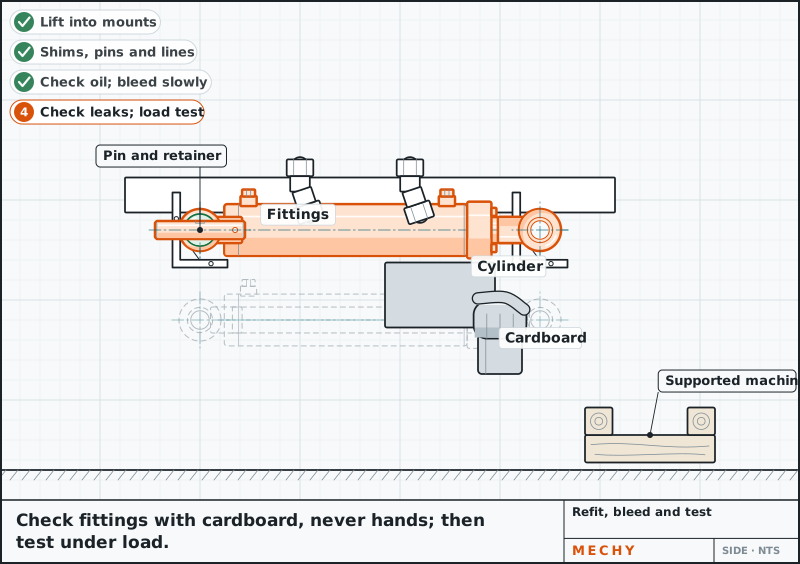
Step 8 of 8
Refit, bleed and test
Lift the cylinder into place, refit shims and pins and reconnect the lines. Check oil level, start the engine and cycle slowly with no load to purge air. Check for leaks with cardboard, test under load with people clear, then recheck level and leaks.
Sling, crane or hoist, cribbing


Common mistakes
- Clamping the chrome rod, which marks it and ruins the new rod seal.
- Pulling the piston out cocked, which scores the bore.
- Fitting seals backwards or leaving out the backup rings.
- Using sharp tools that nick the seal grooves.
- Guessing the torque instead of using the manual.
Questions
Can I repair a hydraulic cylinder myself?
Yes, if the rod and bore are sound. Reseal with a matched kit and the manual torques. A bent rod, scored bore or damaged barrel is a shop job.
Why does my hydraulic cylinder leak at the rod?
Usually a worn rod seal or wiper, or a scored rod. Replace the seals; if the rod is pitted or scored, it needs regrinding or replacing.
How do I get the gland off a cylinder?
Clamp the barrel at the base, release any retaining ring, then turn the gland counter-clockwise with a spanner wrench. Use heat only if the manual allows.
What torque for the piston nut?
It varies by cylinder. Use the OEM manual or the kit sheet. Do not guess, because a loose nut can fail and an over-tight one can damage the piston.
How do I bleed air from a cylinder after repair?
With no load, cycle the cylinder slowly through full stroke several times, then check the oil level and recheck for leaks.
Updated
Different machine? Snap yours.
Mechy reads the machine and the part from your photo and redraws the steps, tools and parts for it.
First guide free. No sign-up, no card.