
Heavy equipment jobs
Line Boring: What It Is and How It’s Done
- 10 h
- Expert
- 11 steps
- 8 tools
- 5 parts
Snap yours and Mechy redraws these steps for it. First guide free, no sign-up.
Sample guide. A heavy-equipment mechanic hasn't reviewed this one yet, so search engines don't index it. Follow your machine's manual where they differ.
Short answer
Line boring restores worn, oval pin bores to one true axis. Centre a portable bar through both bores, weld the bores up, bore them back to size, face the bosses, press in new bushings and refit the pin. Slop and walking bushings go away.
Safety first
Shop or dealer jobDo these before step 1.
- DANGERLockout/tagout: attachment on the ground, engine off, key out, battery isolator off, tag on the controls.
- DANGERBlock or crib every raised part with rated stands. Never work under a load held only by hydraulics.
- DANGERHot work: clear or cover fuel, oil, hoses and grease. Keep an extinguisher at hand and a fire watch for as long as the OEM or site hot-work rule requires.
- WARNINGBefore welding, disconnect the battery and the ECM, monitor and alternator as the OEM manual says.
- WARNINGPut the ground clamp on the same part, close to the weld. Never pass current through bearings, pins or cylinders.
- WARNINGUse a welding helmet, gloves and fume extraction or a respirator. Weld fumes and arc flash are a hazard in a pit or enclosed area.
- WARNINGKeep hands, sleeves and hair clear of the rotating bar and drive. Stop the drive before touching the cutter. Bosses stay hot for hours.
- WARNINGFuel nearby: no ignition sources, no smoking, catch spills.
Stop and call a pro or the dealer if
- Cracks are found in the bosses, welds or structure: call the dealer or a line boring service.
- Bores are too far out of line or too worn to fix with a build-up, or the metal specification is unknown.
- The job needs a heat-treat or an engineered repair, or you lack the correct bar or bore welder: hire a line boring service.
Mechy's guides help, but they don't replace the maker's manual, your training or your site's rules. If something doesn't match what you see, stop and check.
Tools
Tick what you have. In the app, Mechy ticks the ones it can see in your photos.
Parts and supplies
- 2×Pin bushingsOEM size, interference fit per manualCheck before you buy
- 1×Pin (if worn)OEM size and hardnessCheck before you buy
- 1×Bore welding wireper the bore welder maker and the steel typeCheck before you buy
- 2×Seals and wear washersOEMCheck before you buy
- 1×GreaseOEM gradeCheck before you buy
Steps
-
Step 1 of 11
Lower, block and lock out
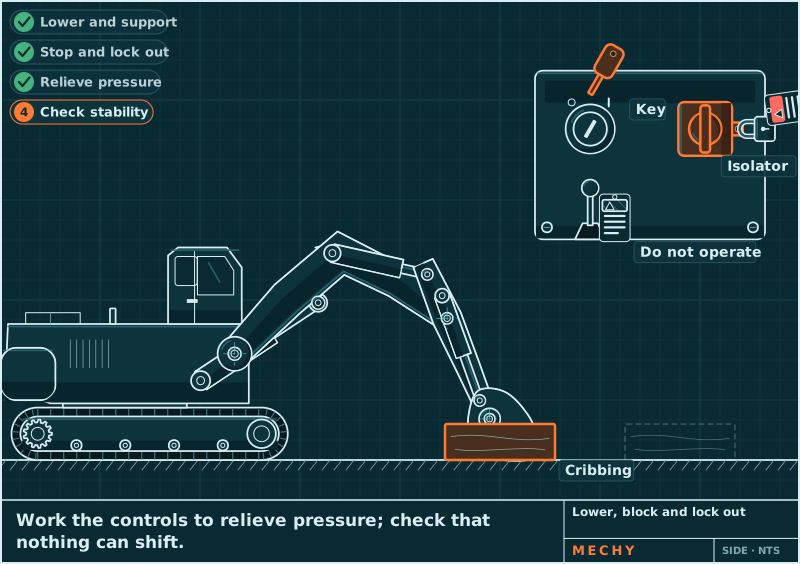
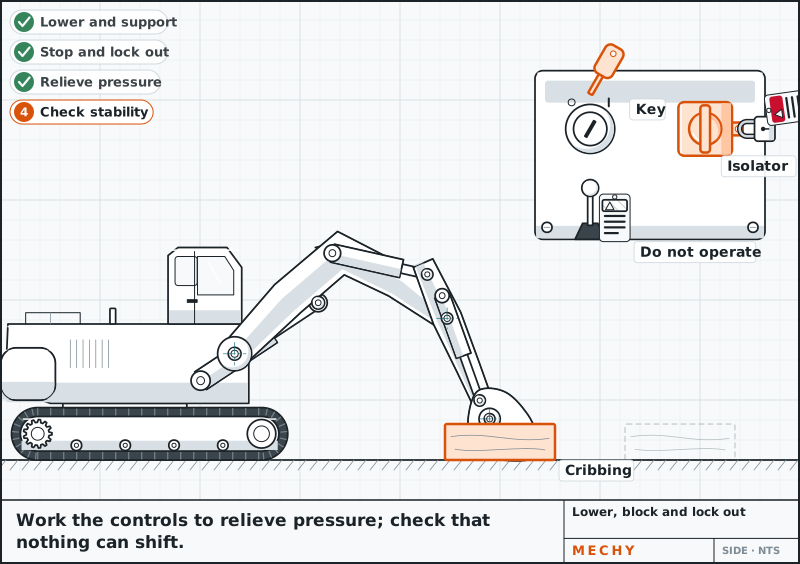
Set the attachment flat on the ground or on cribbing and stop the engine. Work the controls to relieve pressure, then key out, isolator off and tag on. Check that nothing can shift.
Never trust hydraulics to hold a load.
Cribbing and rated stands
-
Step 2 of 11
Pull the pin and clean the bores
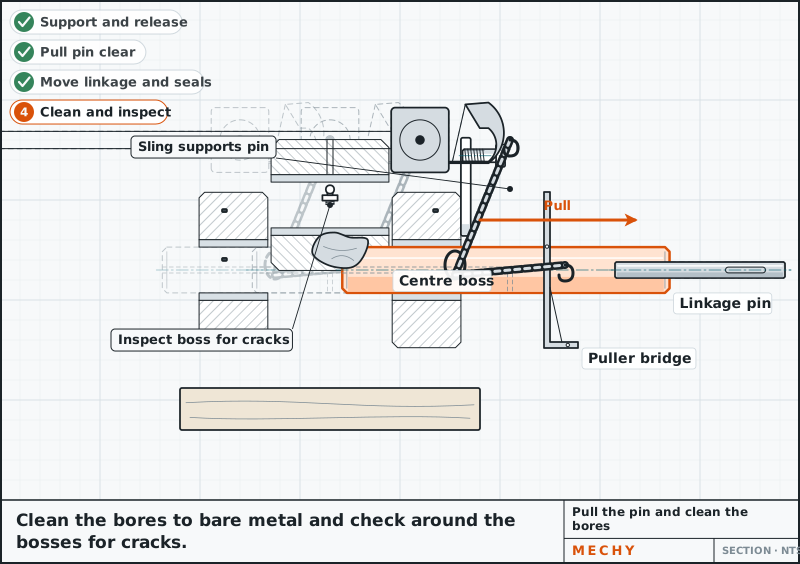
Support the linkage, sling the pin, then drive or pull it out and move the linkage clear. Mark the parts. Remove the seals. Clean the bores to bare metal. Check the bosses for cracks.
Cracks mean stop. See stopIf.
Pin puller or hydraulic pusher, sling
-
Step 3 of 11
Measure wear and ovality
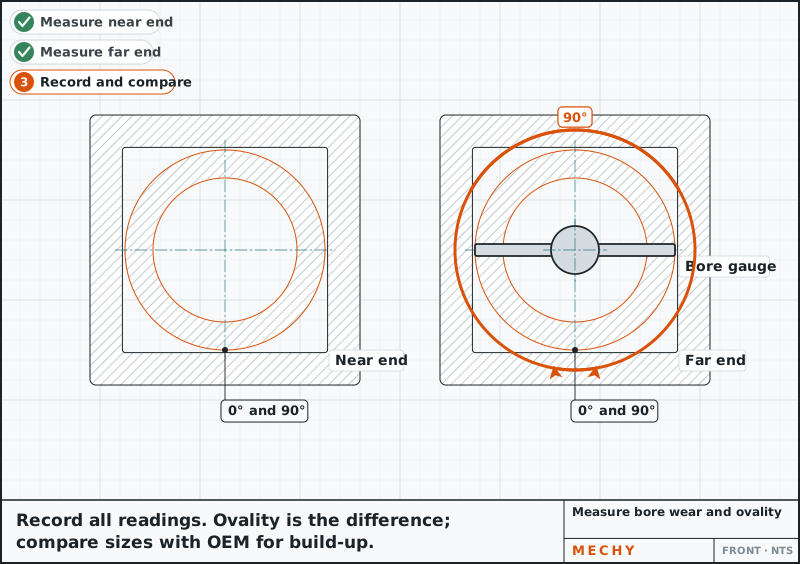
Measure each bore at 0° and 90° at both ends. The difference is the ovality. Compare with the OEM size to decide the build-up. Record all readings.
Wear limit: per OEM manual Check it against your manual.
Inside micrometer or telescoping gauge and bore gauge
-
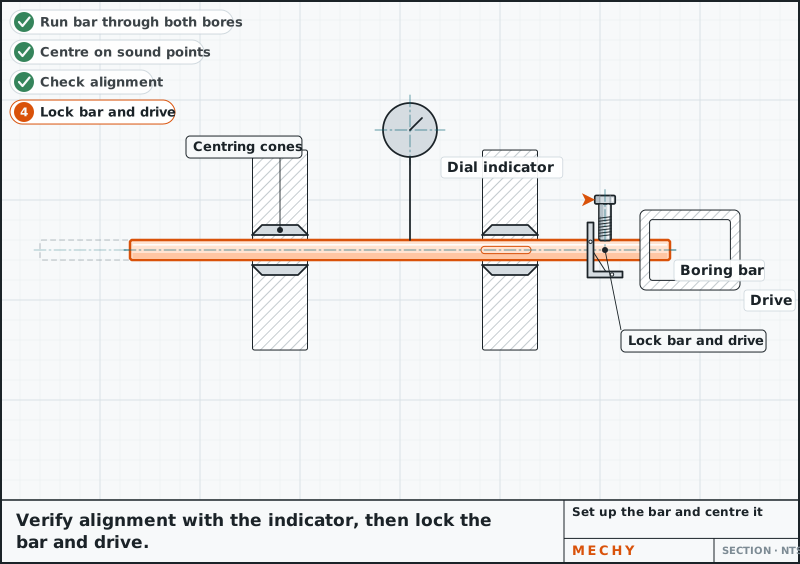
Step 4 of 11
Set up the bar and centre it
Run the bar through both bores. Record the original centreline and boss spacing first. Centre with cones on the least-worn points. Check with a dial indicator. Lock the bar and drive.
Axis runout: per bar maker or OEM limit Check it against your manual.
Portable line boring bar with cones/centring fixtures, Feeler gauge set and a dial indicator
-
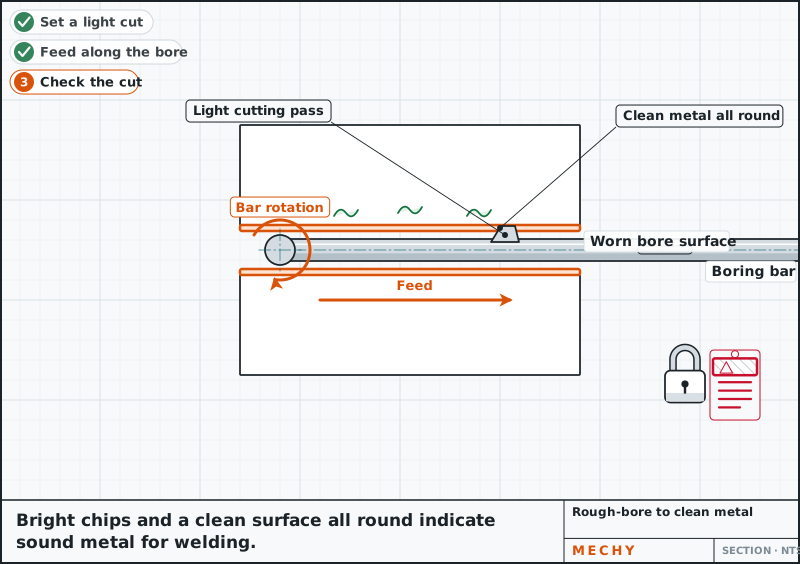
Step 5 of 11
Rough-bore to clean metal
Cut the bores just enough to remove the oval and the hardened, worn surface so the weld bonds to sound metal. Chips should show bright metal all round. Stop the drive before touching anything.
Portable line boring bar with cones/centring fixtures
-
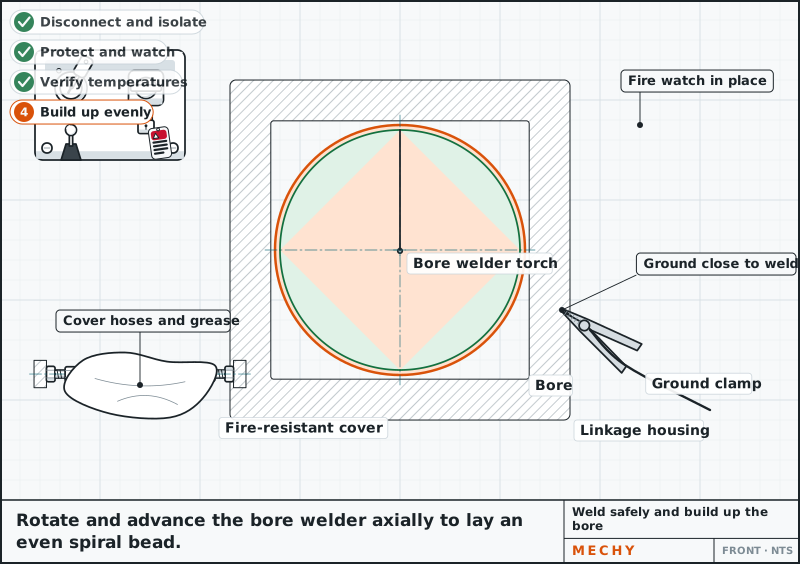
Step 6 of 11
Prepare the machine for hot work
Remove the bar and drive. Disconnect the battery and electronics per the OEM manual. Put the ground clamp close to the weld. Cover hoses, seals and grease and clear fuel and oil. Set the extinguisher and fire watch.
Cover every part the weld could harm.
Welding PPE, extinguisher
-
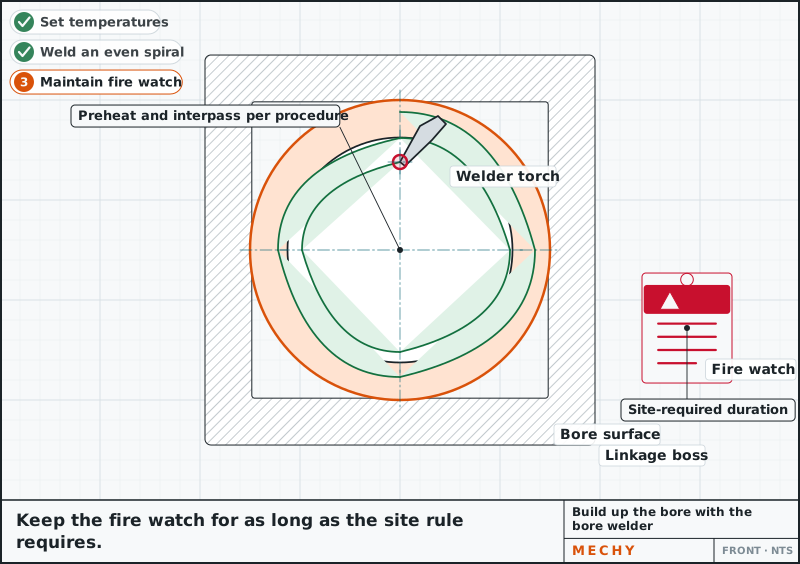
Step 7 of 11
Build up the bores with the bore welder
Set the preheat and interpass temperature for the steel. Build up with the bore welder in an even spiral across the bore. Keep the fire watch for as long as the site rule requires.
Preheat: per steel type and OEM Check it against your manual.
Bore welder (portable), Welding PPE, extinguisher
-
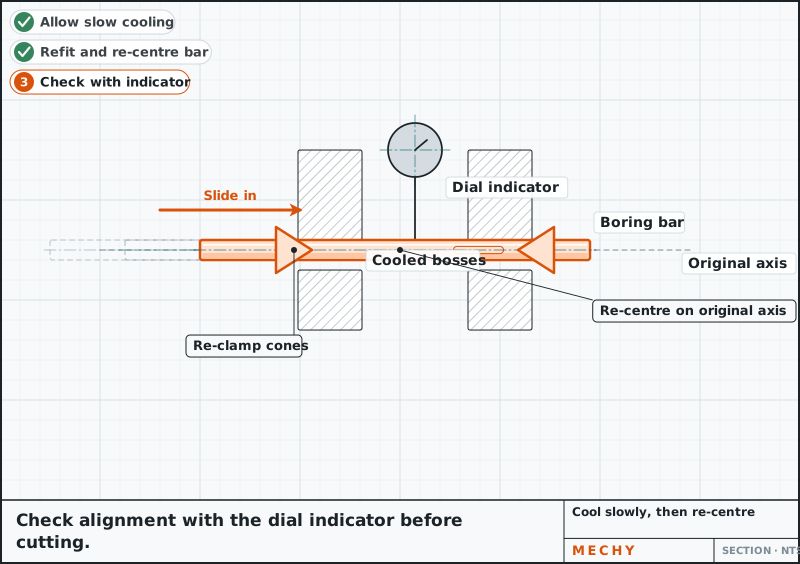
Step 8 of 11
Cool slowly, then re-centre
Let the bosses cool slowly, with no water or air blast. Refit the bar and re-centre on the recorded axis. Check with the dial indicator before cutting.
Portable line boring bar with cones/centring fixtures, Feeler gauge set and a dial indicator
-
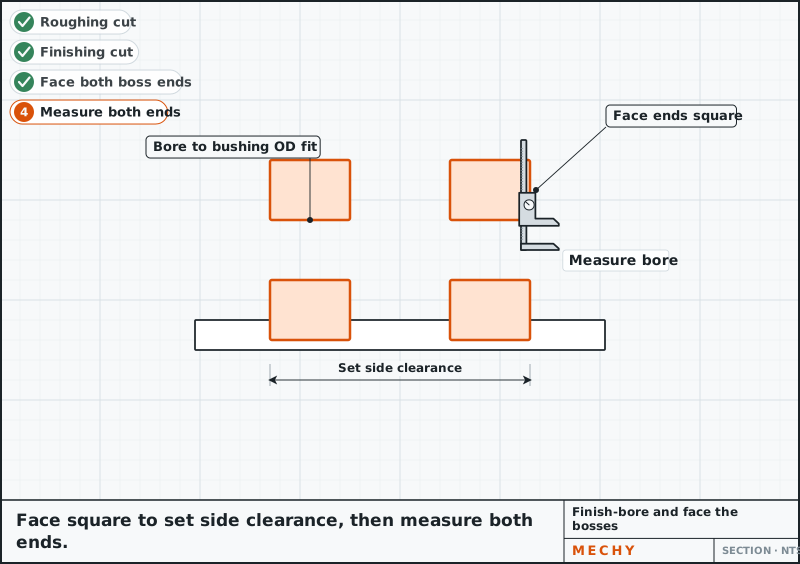
Step 9 of 11
Finish-bore and face the bosses
Take a roughing then a finishing cut to bushing OD less interference. Face the boss ends square to set side clearance per OEM. Measure both ends with the part at ambient temperature.
Bore size: bushing OD less interference per OEM Check it against your manual.
Portable line boring bar with cones/centring fixtures, Inside micrometer or telescoping gauge and bore gauge
-
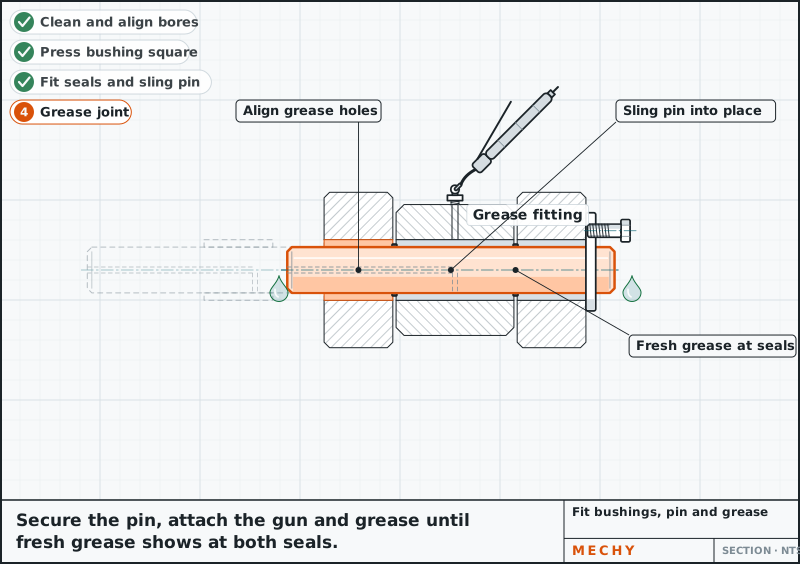
Step 10 of 11
Fit bushings, pin and grease
Clean the bores and press in the bushings square, chilled with dry ice if the manual allows. Align the grease holes. Fit the seals, sling the pin in and grease until fresh grease shows at the seals. Check the joint moves freely.
Interference fit: per OEM manual Check it against your manual.
Bushing press or driver, dry ice, Pin puller or hydraulic pusher, sling
-
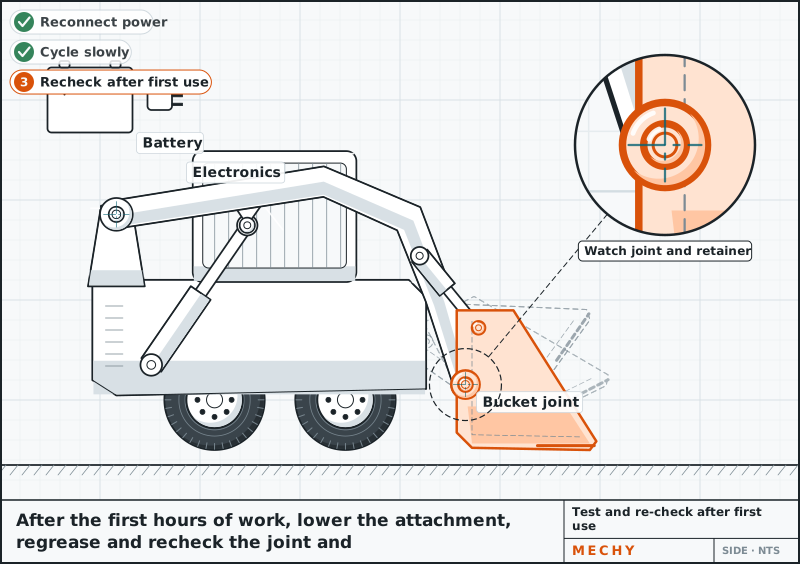
Step 11 of 11
Test and re-check after first use
Reconnect the battery and electronics. Cycle the attachment slowly through full travel and watch for binding, noise or slop. After the first hours of work, regrease and recheck the joint and the pin retainers.


Common mistakes
- Boring without recording the original axis, so the bores are re-cut off line after welding.
- Welding with the battery and electronics connected, or with the ground clamp far from the weld.
- Quenching the bosses with water or air after welding, which can crack them.
- Measuring the finished bore while it is still warm, so the interference fit ends up wrong.
- Welding over cracks instead of stopping and calling a service.
Questions
What is line boring?
Line boring machines worn pin bores back to one true axis. Worn bores are usually welded up first, then bored to size for new bushings or a pin.
How does portable line boring work?
A bar runs through both bores and is centred with cones, so the cutter turns on one axis. The bores are cut, welded, then bored to the final size on the same axis.
Why do pin bores wear oval?
Load and movement make the pin wallow the bore in the direction of the load. The joint gets slop and the bushings begin to walk.
Do I need to disconnect the battery before welding?
Follow the OEM manual. Most call for disconnecting the battery and the ECM and monitor to protect the electronics from welding current.
When should I hire a line boring service?
Hire one if there are cracks, the bores are far out of line, the steel is unknown, or you lack the correct bar or bore welder.
Updated
Different machine? Snap yours.
Mechy reads the machine and the part from your photo and redraws the steps, tools and parts for it.
First guide free. No sign-up, no card.