
Heavy equipment jobs
How to Bleed a Hydraulic System or Cylinder
- 45 min
- Intermediate
- 9 steps
- 6 tools
- 2 parts
Snap yours and Mechy redraws these steps for it. First guide free, no sign-up.
Sample guide. A heavy-equipment mechanic hasn't reviewed this one yet, so search engines don't index it. Follow your machine's manual where they differ.
Short answer
To bleed a hydraulic system, fill the tank with the specified oil, check every fitting you touched, run at low idle, cycle each function slowly and then through full strokes without holding the end stop, bleed the cylinder screw only at low pressure, and recheck the level.
Safety first
Specialist task: trained techs onlyDo these before step 1.
- DANGERStored energy: follow the OEM discharge procedure for struts, springs and accumulators. Specialist task.
- DANGERLockout/tagout first: implements on the ground, engine off, key out, isolator off, tag on controls. Crib anything that must stay raised.
- DANGERNever crack a fitting under load or with the implement raised. Relieve pressure first: work the controls with the engine off.
- DANGERNever feel for leaks by hand: injection injury. Use cardboard and a light. Any skin puncture by oil needs a doctor at once.
- WARNINGKeep everyone clear of the implement swing and the machine while you cycle functions.
- WARNINGHot oil burns. Let it cool before opening fittings or bleed screws; wear gloves and a face shield.
- WARNINGDon't hold a function against the end stop: heat and relief-valve load damage the pump and seals.
Stop and call a pro or the dealer if
- Air or foam keeps returning after repeated cycling: suspect a suction leak, so stop and trace it.
- The pump stays noisy or cavitates after bleeding.
- A fitting or hose leaks that you can't seal at OEM torque.
- The movement stays spongy or jerky: call the dealer.
Mechy's guides help, but they don't replace the maker's manual, your training or your site's rules. If something doesn't match what you see, stop and check.
Tools
Tick what you have. In the app, Mechy ticks the ones it can see in your photos.
Parts and supplies
- 1×Hydraulic oilgrade and type as called for in the OEM manualCheck before you buy
- 1×Spare O-rings or seals for any fitting that weepsmatch the fittingCheck before you buy
Steps
-
Step 1 of 9
Lock out and relieve pressure
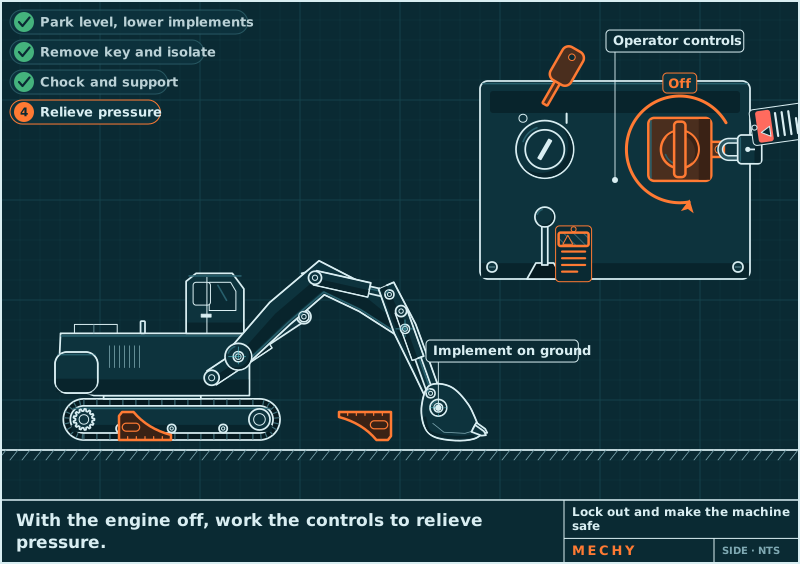
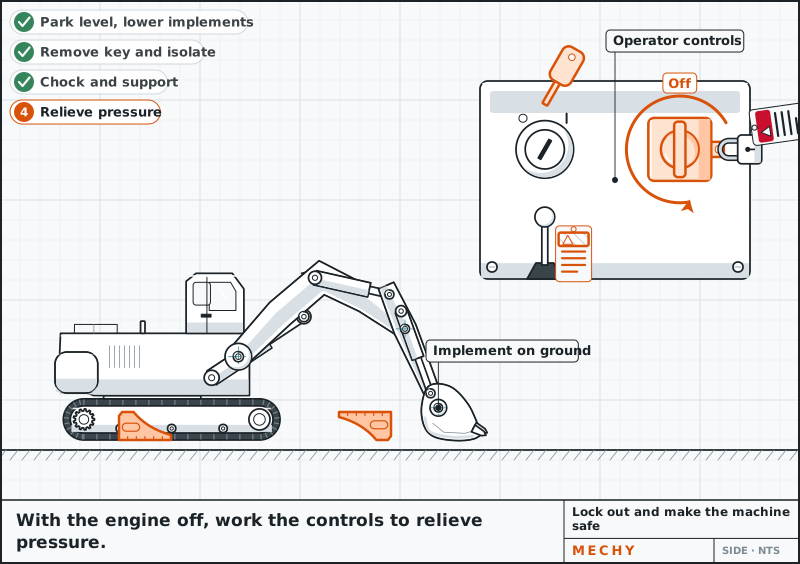
Park level, implements on the ground, engine off, key out, isolator off, tag on controls. Chock or crib anything raised. Work the controls with the engine off to relieve pressure, including any accumulator as the manual shows.
Cribbing and wheel chocks
-
Step 2 of 9
Check every fitting you touched
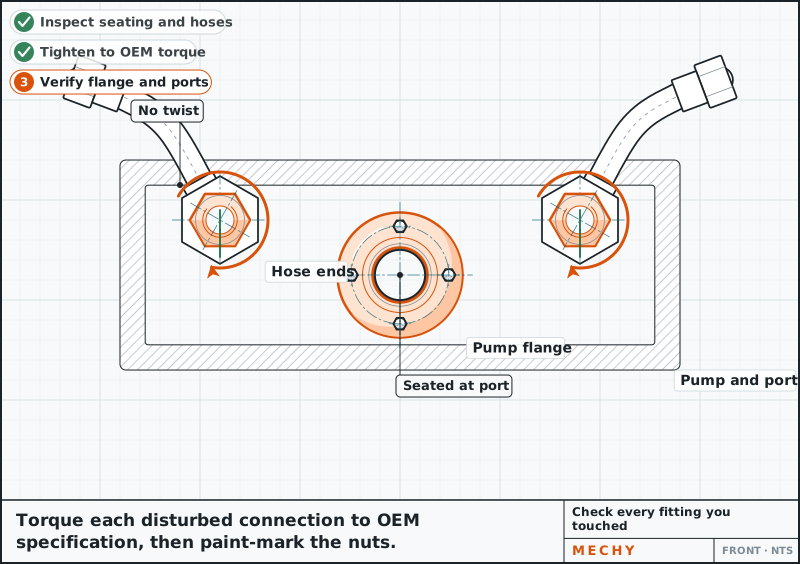
Confirm each hose end, pump flange and port you disturbed is clean, seated and tight with no twisted hose. Tighten to the torque in the manual, then paint-mark the nuts so movement shows later.
Torque: per OEM manual for each fitting Check it against your manual.
Wrench set for fittings
-
Step 3 of 9
Fill the tank to the mark
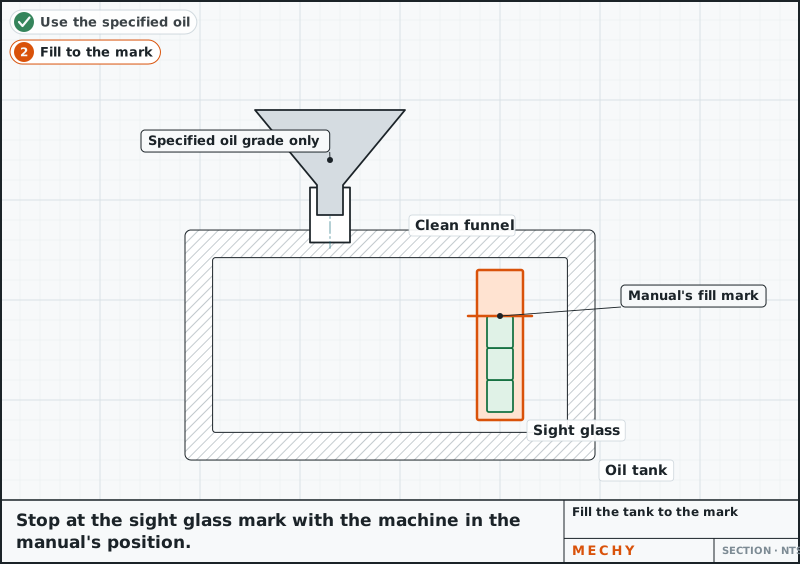
Fill through a clean funnel or fill pump with the oil the manual calls for, to the sight glass or dipstick mark in the manual's position. Never mix grades. Fill a new pump case with oil as the manual says before starting.
Clean funnel or fill pump
-
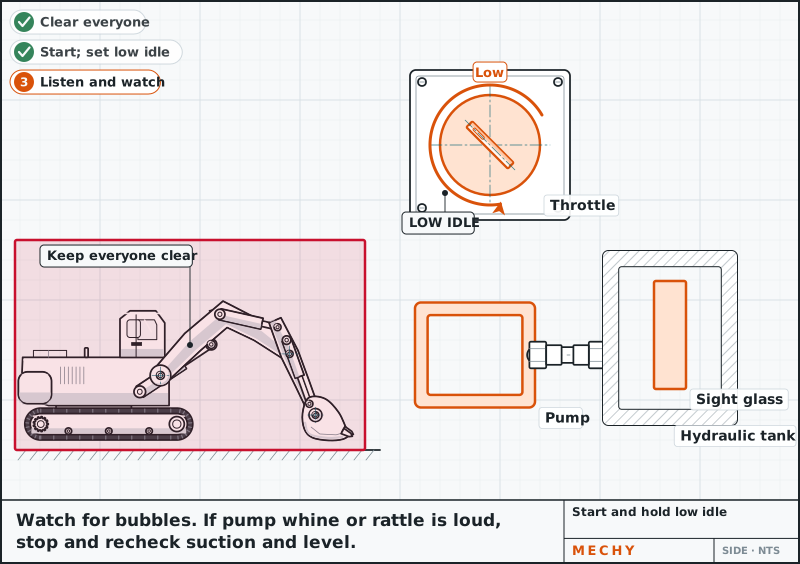
Step 4 of 9
Start and hold low idle
Check suction valves are open and the level is at the mark. Clear everyone from the machine. Remove your own lock and tag, start the engine and leave it at low idle. Listen at the pump; if whine or rattle is loud, stop and recheck suction and level.
Shut down at once on loud pump noise or a gushing leak.
-
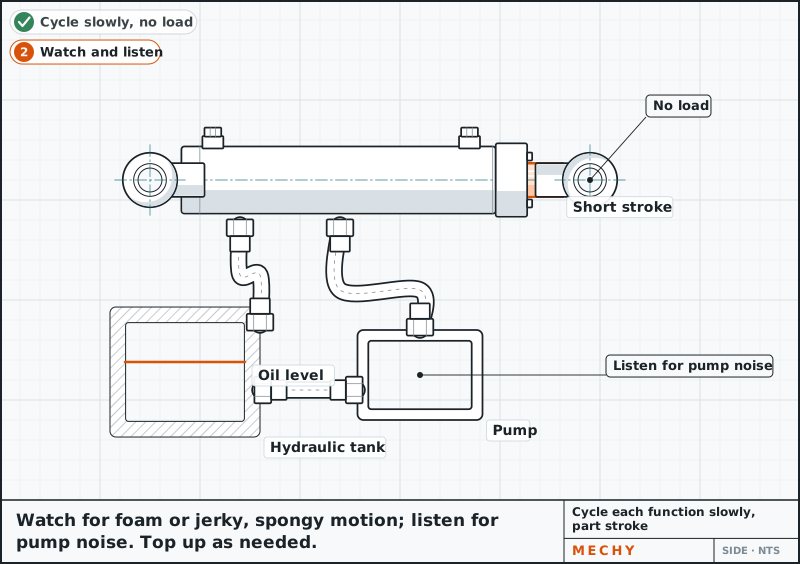
Step 5 of 9
Cycle each function slowly, part stroke
With the implement clear of the ground and of people, move each function slowly through part of its stroke, back and forth, with no load. Watch for foamy oil, jerky or spongy movement and pump noise. Top up whenever the level drops below the mark.
-
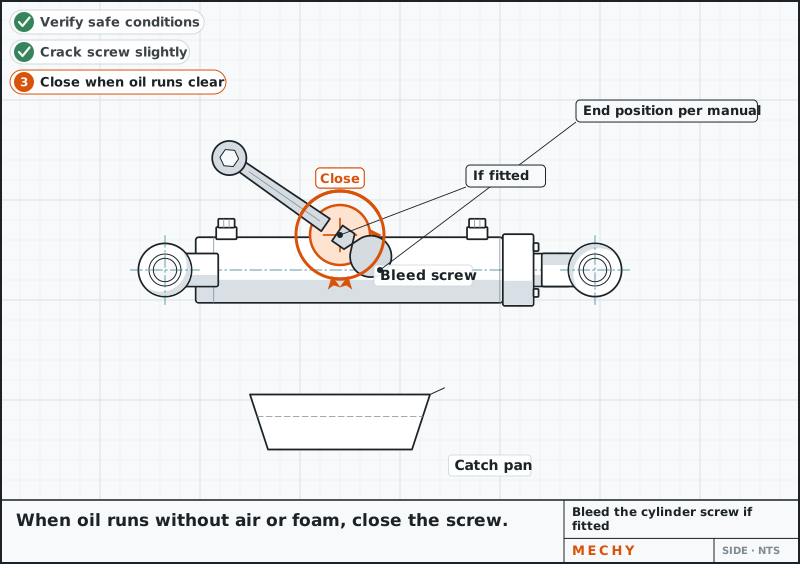
Step 6 of 9
Bleed the cylinder screw if fitted
Only at low pressure, with the cylinder at the end the manual states and no movement commanded, crack the bleed screw just enough for oil to weep. Close it when the oil runs without air or foam. Catch the oil in a pan.
Never open a bleed screw under load or high pressure.
Hex or wrench for bleed screw, Drain pan and rags
-
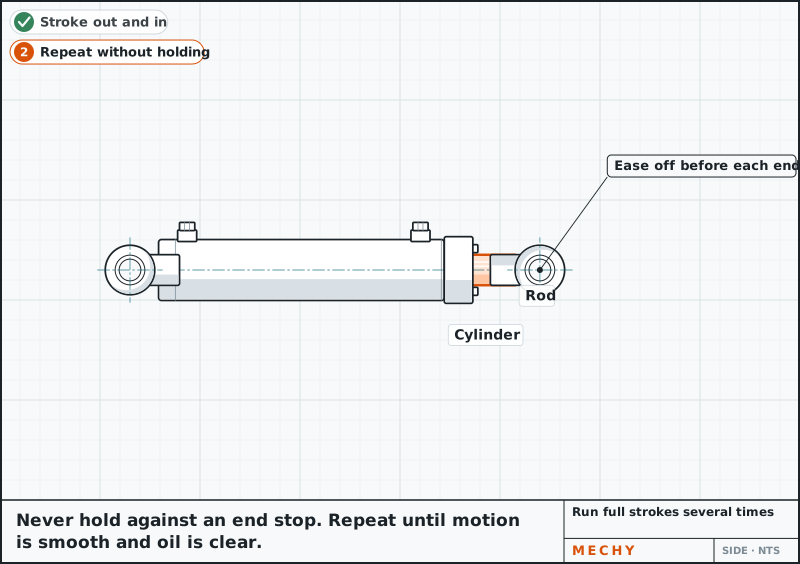
Step 7 of 9
Run full strokes several times
Run each function through full strokes several times, slowly, easing off before the end stop and never holding against it. Repeat until the movement is smooth and the oil in the sight glass is free of foam.
-
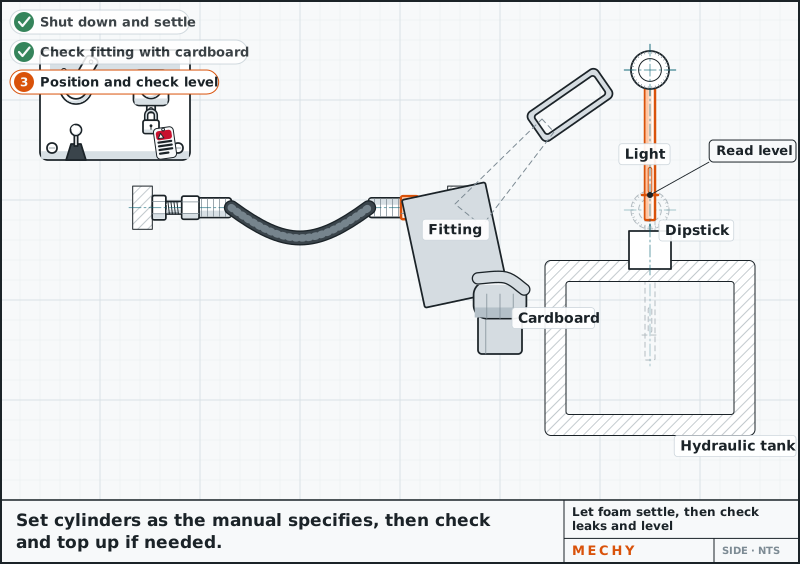
Step 8 of 9
Settle the oil, check leaks and level
Shut down and let foamy oil settle. Check fittings with cardboard and a light, not your hand. Set the cylinders in the position the manual shows, then top up to the mark without overfilling.
Cardboard and flashlight
-
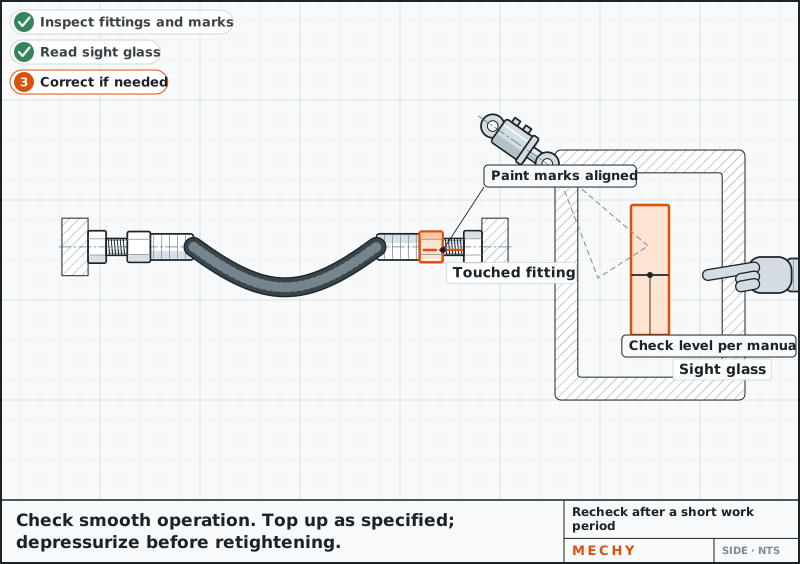
Step 9 of 9
Recheck after a short work period
After the machine has worked under light load, recheck for leaks at every touched fitting, paint marks for movement, level and smooth operation. Top up and retighten if needed.


Common mistakes
- Starting the engine before filling the pump case and tank to the mark.
- Holding a function against the end stop, which overheats oil and loads the relief valve.
- Opening a bleed screw with pressure on or the implement raised.
- Feeling for leaks with a bare hand instead of cardboard.
- Ignoring foam that keeps returning, when it points to a suction leak.
Questions
How do you bleed a hydraulic system?
Fill the tank with the specified oil, check fittings, run at low idle, cycle each function slowly through part strokes, then full strokes without holding the end stop. Top up as the level drops, then recheck level.
How do you know there is air in a hydraulic system?
Foamy oil, spongy or jerky movement and pump whine or rattle. Milky or bubbly oil in the sight glass points to aeration.
Do all hydraulic cylinders have a bleed screw?
No. Many are bled by cycling alone. Use a bleed screw only if the cylinder has one, at low pressure and at the end of stroke the manual states.
Why does air keep coming back after bleeding?
Usually a suction-side leak, a loose fitting or a low oil level. Stop and trace it rather than cycling longer.
Can I run the pump dry to bleed it?
No. Fill the pump case and tank first, because a dry pump can be damaged within seconds.
Updated
Different machine? Snap yours.
Mechy reads the machine and the part from your photo and redraws the steps, tools and parts for it.
First guide free. No sign-up, no card.