Home repairs
How to Fix a Hole in Drywall (Small to Large)
- 4 h
- Easy
- 8 steps
- 12 tools
- 8 parts
Snap yours and Mechy redraws these steps for it. First guide free, no sign-up.
Short answer
Pick the repair by hole size: spackle for nail and screw holes, a self-adhesive mesh patch up to about doorknob size, a backer-strip patch for bigger holes. Finish with thin coats of compound, sand, prime and paint. Most of the time is drying.
Safety first
DIY friendlyDo these before step 1.
- DANGERNear an outlet or switch, turn off that circuit's breaker and confirm with a non-contact voltage tester before you put a hand or tool in the hole.
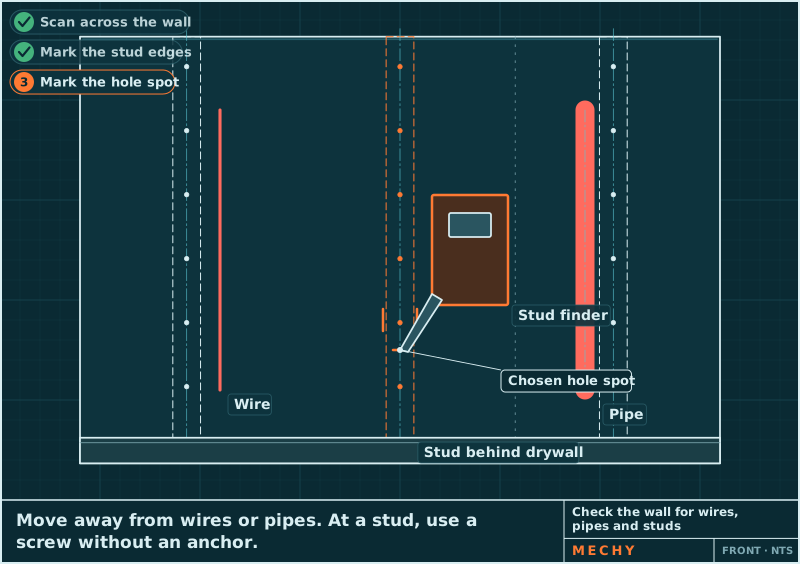
- WARNINGLook inside with a flashlight for wires and pipes before you cut or screw. Probe only with a wood or plastic stick, gently.
- WARNINGWear an N95 dust mask when sanding and keep the room ventilated. Drywall dust is bad to breathe.
- WARNINGIn a home built before 1978, the paint may contain lead. Test it before sanding or cutting.
- NOTICEWear safety glasses when cutting, drilling or sanding. Cut slowly, with your free hand out of the blade's path.
- NOTICELet each coat dry fully. Check the tub label; it is usually hours.
Stop and call a pro or the dealer if
- You find wires or pipes in the area you need to cut or screw into.
- The drywall around the hole is wet, moldy or crumbling.
- The hole is near an outlet or switch and you are unsure the power is off.
- Cracks keep returning or spread across the wall or ceiling.
- Your home predates 1978 and the paint tests positive for lead.
Mechy's guides help, but they don't replace the maker's manual, your training or your site's rules. If something doesn't match what you see, stop and check.
Tools
Tick what you have. In the app, Mechy ticks the ones it can see in your photos.
Parts and supplies
- 1×Spacklelightweight, ready-mixedCheck before you buy
- 1×Self-adhesive mesh patchcovers the hole with about 1 in to spare on each sideCheck before you buy
- 1×Joint compoundready-mixed, all-purposeCheck before you buy
- 1×Drywall piecesame thickness as the wall (check an edge of the hole)Check before you buy
- 2×Wood backer strips1x3, about 4 in longer than the openingCheck before you buy
- 1×Drywall screwscoarse thread, 1-1/4 in for 1/2 in board; 1 boxCheck before you buy Size chart
- 1×Drywall tapepaper or mesh, about 2 in wideCheck before you buy
- 1×Primer and paintprimer plus matching wall paintCheck before you buy
Steps
-
Step 1 of 8
Make it safe, check inside and pick your repair
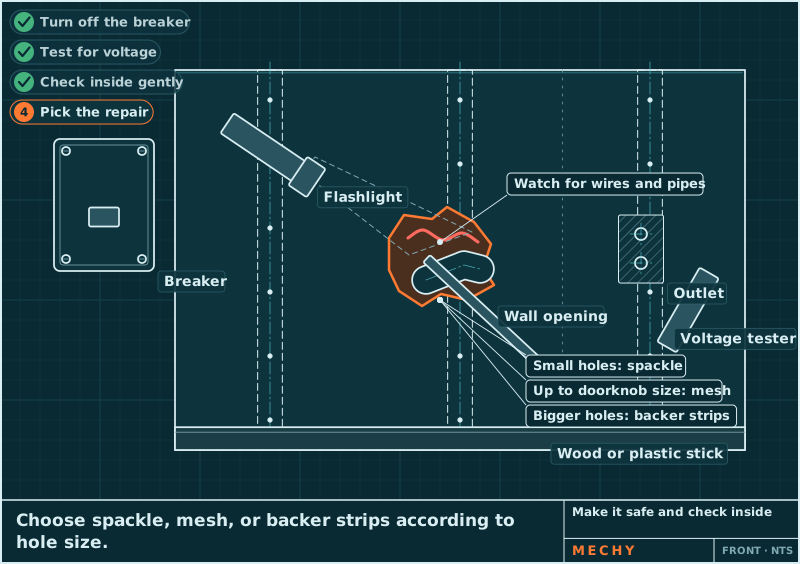
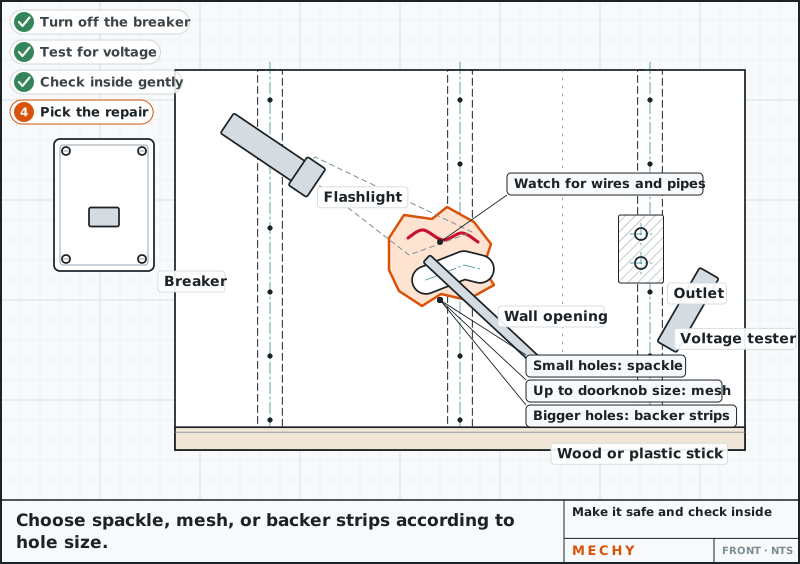
Near an outlet or switch, turn off the breaker and test with the voltage tester. Shine a flashlight in and gently feel with a wood or plastic stick, not your fingers. Nail/screw holes: spackle. Up to doorknob size: mesh. Bigger: backer strips.
If you see or touch a wire or pipe in the area to cut, stop and read the Stop list.
Flashlight, Non-contact voltage tester
-
Step 2 of 8
Small holes: press in spackle
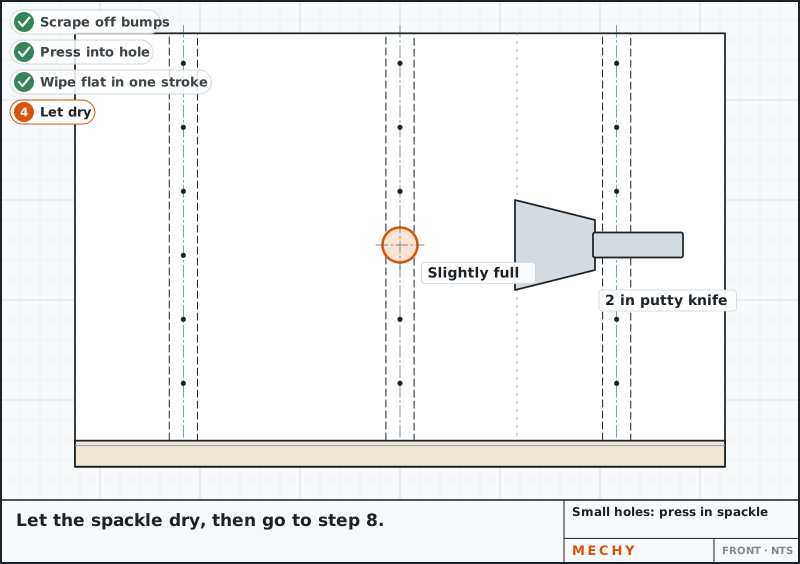
Scrape off any bumps. Load the 2 in putty knife with spackle and press it into the hole, then drag the blade flat across to leave it slightly full. Let it dry fully, then go to the sanding step.
Putty knife
-
Step 3 of 8
Medium holes: stick on a mesh patch
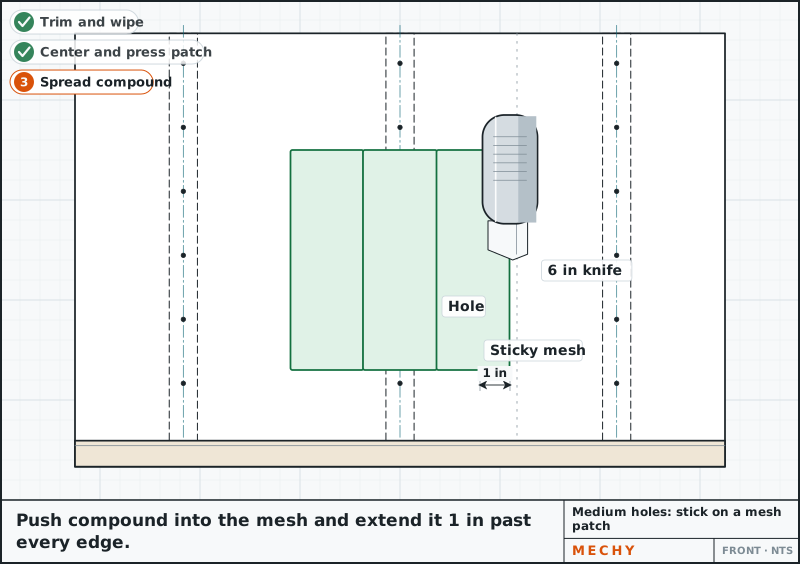
Trim loose paper around the hole with the utility knife and wipe off dust. Press the sticky mesh patch over the hole, centered, and rub it flat. Spread compound over it with the 6 in knife, pushing it into the mesh, 1 in past each edge. Let dry, then go to step 7.
Putty knife, Utility knife
-
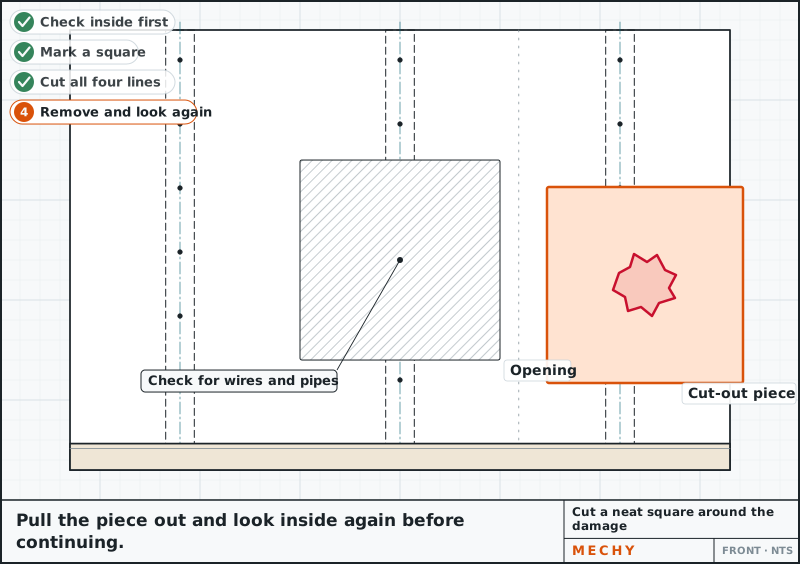
Step 4 of 8
Big holes: mark and cut a neat square
Check inside for wires and pipes first. Draw a square around the damage with a straightedge and pencil. Cut the lines with the drywall saw, slowly, just through the board. Pull the piece out and look again.
Cut only through the drywall. If you hit wire or pipe, stop.
Drywall saw, Level or straightedge, Tape measure and pencil, Flashlight
-
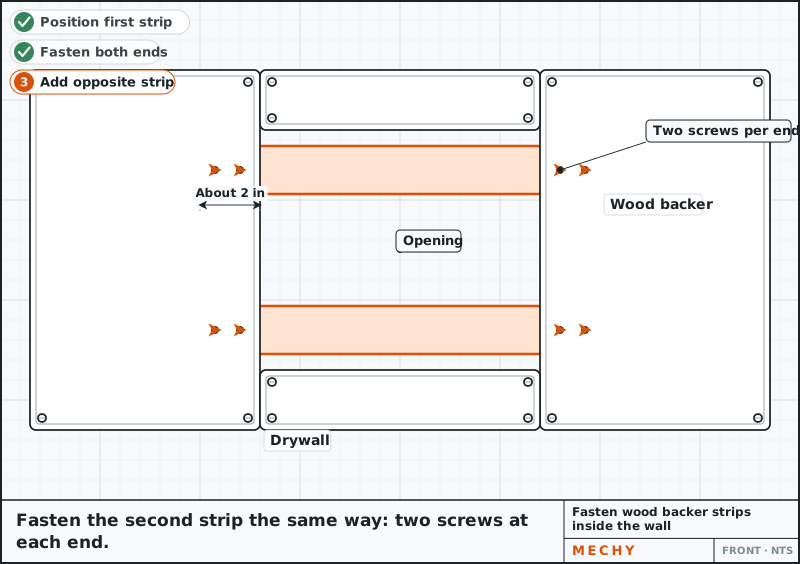
Step 5 of 8
Fasten wood backer strips inside the wall
Slide a strip into the opening, across it, so about 2 in sits behind the wall on each side. Hold it flat and drive screws through the wall into it, two per side. Add a second strip on the opposite edge of the opening.
Drill/driver with bits
-
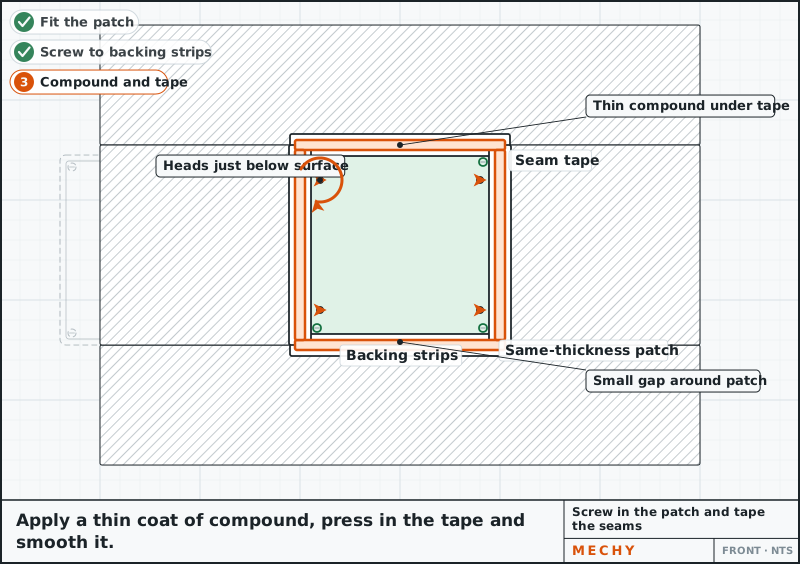
Step 6 of 8
Screw in the new piece and tape the seams
Cut a same-thickness piece to fit with a small gap all round. Screw it to the strips, sinking the heads just below the surface. Spread a thin coat of compound over the seams, press the tape in, and smooth with the knife.
Drill/driver with bits, Drywall saw, Utility knife, Putty knife
-
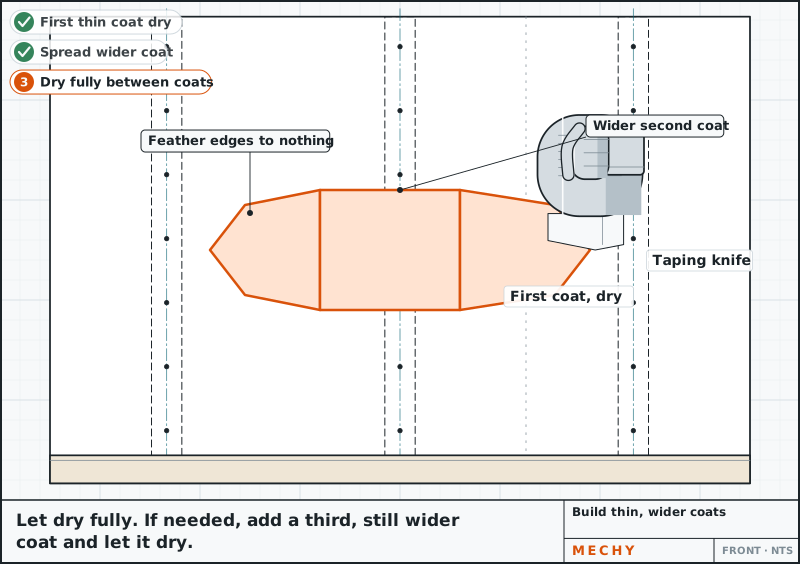
Step 7 of 8
Add thin coats, each wider than the last
Spread a thin coat with the 6 in knife and let it dry fully (uniform color, hard to the touch). Add a second coat a couple of inches wider each side with the taping knife, thinning the edges to nothing (feather). Add a third if you see dips. Dry fully between coats.
Taping knife, Putty knife
-
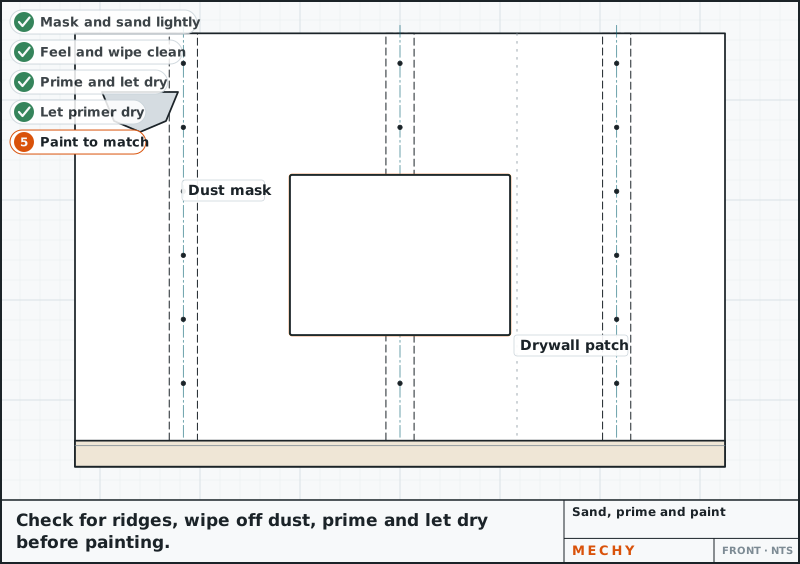
Step 8 of 8
Sand, prime and paint
Put on your dust mask and glasses. Sand lightly with the sponge until smooth; run a hand across to feel for ridges. Wipe off dust. Prime the patch, let dry, then paint to match. Look at the patch in side light for ridges.
Sanding sponge, Dust mask and safety glasses, Paint brush or small roller


Common mistakes
- Cutting or screwing without checking for wires and pipes first.
- Putting on one thick coat of compound instead of thin coats.
- Not letting each coat dry fully before the next.
- Not feathering the edges wide enough, so the patch shows.
- Skipping primer, so the patch shows through the paint.
Questions
How do I fix a small hole in a wall?
Press spackle into the hole with a putty knife and wipe it flat, leaving it slightly full. Let it dry fully, sand lightly, then prime and paint.
How do I patch a hole the size of a doorknob?
Stick a self-adhesive mesh patch over the hole and spread joint compound over it, past the edges. Add thin, wider coats, sand, prime and paint.
How do I fix a large hole in drywall?
Cut a neat square, fasten wood strips behind the edges, screw in a same-thickness drywall piece, tape the seams, then finish with thin coats.
Why does my patch show through the paint?
Usually the compound was not feathered wide enough, or the patch was not primed. Add a wider thin coat, sand, and prime before painting.
Sources
Updated
Not quite the same? Snap yours.
Mechy looks at your photo and redraws the steps for what you actually have.
First guide free. No sign-up, no card.
Related guides