Home repairs
How to Fix a Leaky Faucet
- 1 h
- Easy
- 7 steps
- 6 tools
- 3 parts
Snap yours and Mechy redraws these steps for it. First guide free, no sign-up.
Short answer
To stop a dripping spout, shut off the water and replace the worn inner part: a cartridge in most one-handle faucets, or a rubber washer and O-ring in older two-handle ones. It takes about an hour with basic hand tools.
Safety first
DIY friendlyDo these before step 1.
- WARNINGShut off both under-sink valves (turn them clockwise), then open the faucet to drain it. Water must stop before you take anything apart.
- WARNINGIf a valve will not close, or turns only with force, shut the main water valve for the house instead. Do not force old valves.
- WARNINGPlug the drain with a stopper or a rag bigger than the hole. Small screws and clips vanish down it fast.
- NOTICEOne handle that stops hard = cartridge or ceramic disc. Two handles that squeeze shut = compression washer.
- NOTICELay parts out in the order removed, on a towel. Take a phone photo at each stage so you can rebuild it.
- NOTICEKeep the faucet open while you work so no pressure can build; close it only after the water is back on.
Stop and call a pro or the dealer if
- Call a plumber if a shutoff valve will not close or leaks when you turn it.
- Stop if the faucet body or nut is cracked, or the nut will not budge without force.
- Stop if it still drips after fitting a correct new part: the seat inside may be worn or pitted.
- Stop if you cannot find a matching part, or the faucet has no visible nut, clip or screw.
Mechy's guides help, but they don't replace the maker's manual, your training or your site's rules. If something doesn't match what you see, stop and check.
Tools
Tick what you have. In the app, Mechy ticks the ones it can see in your photos.
Parts and supplies
- 1×Replacement cartridge (one-handle faucets)Match the old one by shape, length and splines; take it to the storeCheck before you buy
- 2×Stem washer and O-ring (two-handle faucets)Same diameter and shape (flat or beveled) as the old onesCheck before you buy Size chart
- 1×Plumber's greaseSilicone-based, rated safe for drinking waterCheck before you buy
Steps
-
Step 1 of 7
Shut off water, drain, and plug the drain
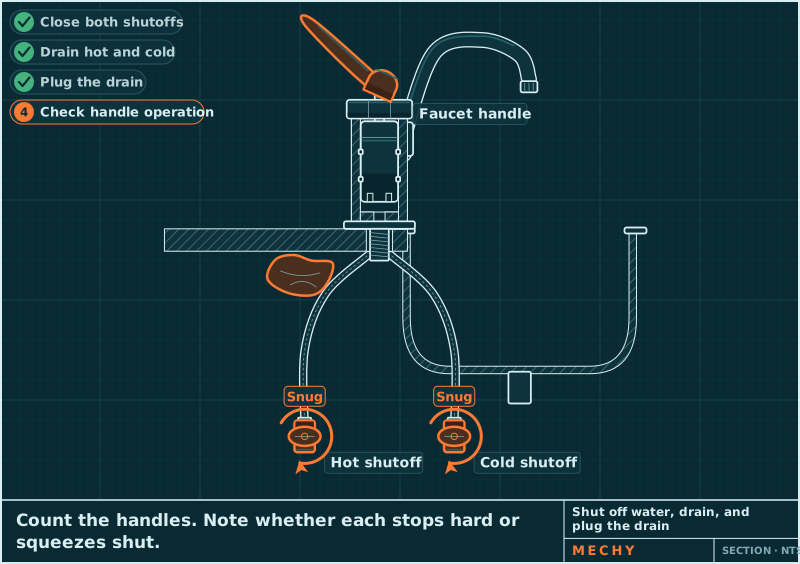
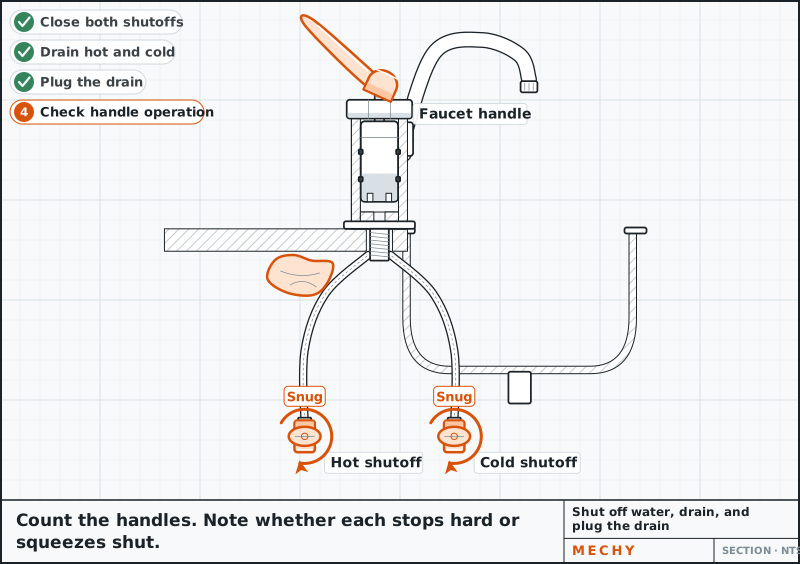
Turn both valves under the sink clockwise until snug. Open the faucet (hot and cold) until it stops running, and leave it open. Plug the drain. Count the handles and note whether each stops hard or squeezes shut.
If the water keeps running, the valve is not shut. Do not continue.
Rags and a small bowl
-
Step 2 of 7
Pop off the cap and remove the handle
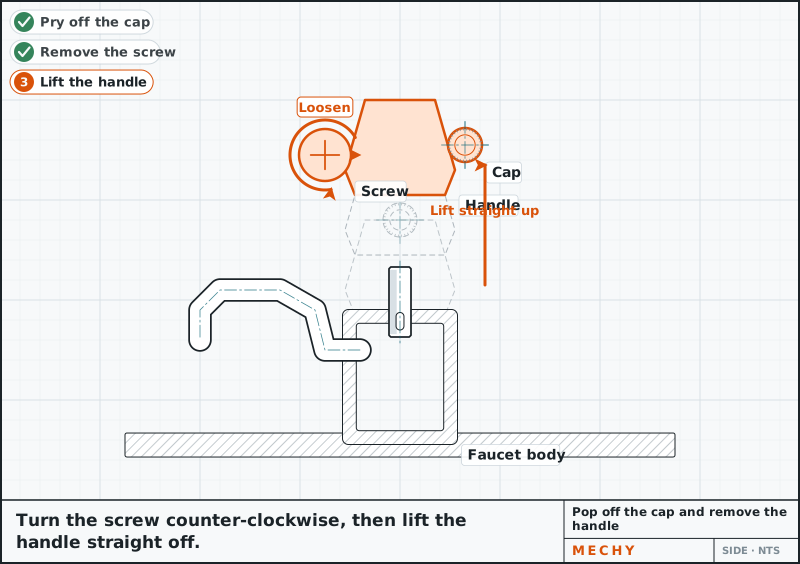
Pry off the small decorative cap (marked H/C or blank) with a flat screwdriver tip. Take out the screw under it with a Phillips driver, or a hex key if it is a side set screw. Lift the handle straight up or off.
Stuck handle: wiggle it gently. Do not pry against the sink; it cracks.
Screwdrivers, Hex (Allen) keys
-
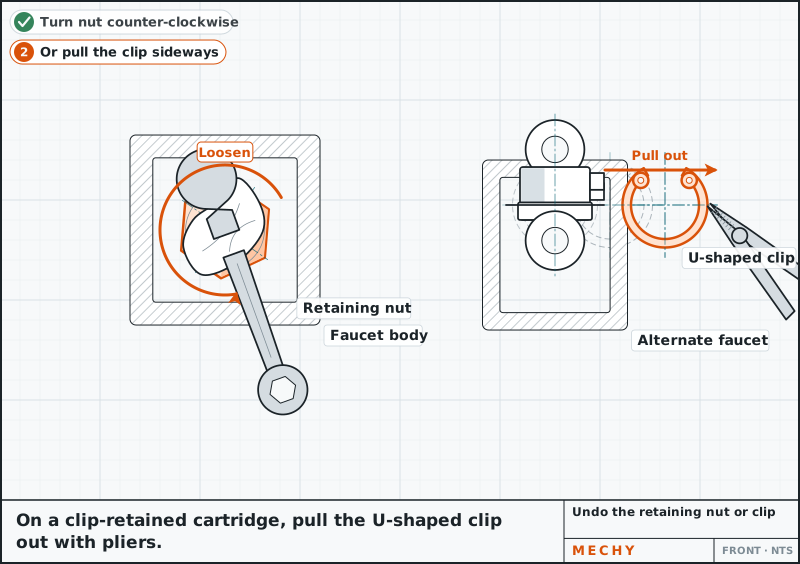
Step 3 of 7
Undo the nut or clip holding the inner part
Under the handle is a metal bonnet or retaining nut. Pad the wrench jaws with a rag and turn it counter-clockwise. Some cartridges instead hold with a U-shaped clip: pull it out with pliers.
If the nut will not turn with firm hand pressure on the wrench, stop. Do not use a pipe on the handle.
Adjustable wrench, Needle-nose pliers, Rags and a small bowl
-
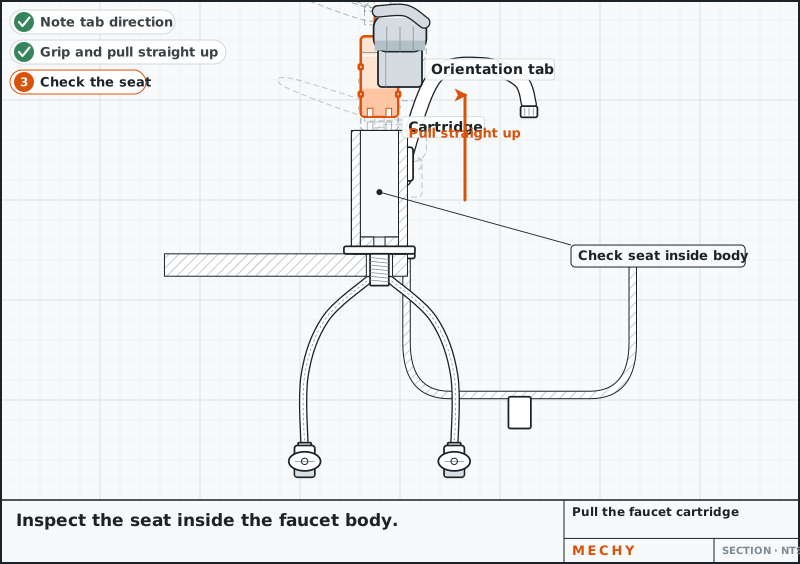
Step 4 of 7
Pull the cartridge, or the stem and washer
One handle: grip the cartridge stem and pull straight up, twisting if tight. Note which way the flat side or tab faces. Two handles: unscrew the stem, remove the rubber washer (held by a small screw) and the O-ring. Check the seat inside.
Remember the cartridge direction. Wrong way round gives hot/cold reversed or leaks.
Needle-nose pliers, Screwdrivers
-
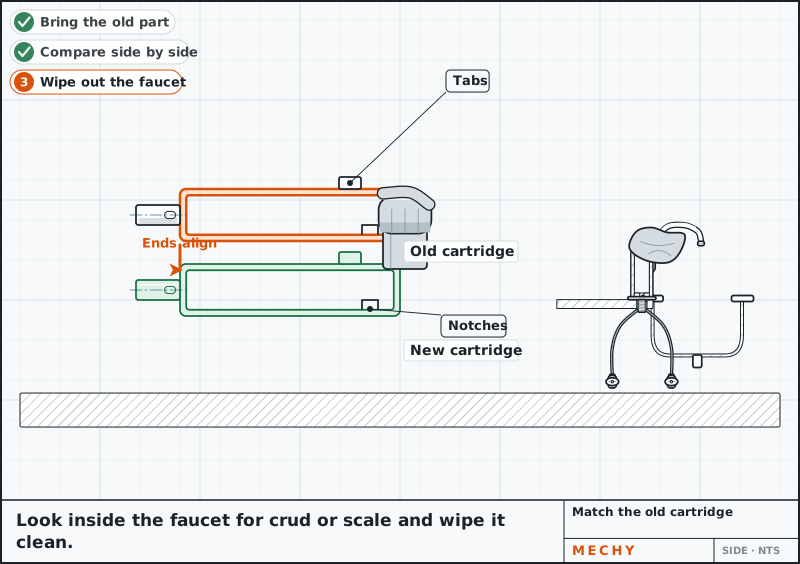
Step 5 of 7
Match the part at the store
Take the old cartridge, or washer and O-ring, to the hardware store and ask for an exact match. Compare size, shape and the notches. Buy a spare washer screw if the old one is corroded.
Rags and a small bowl
-
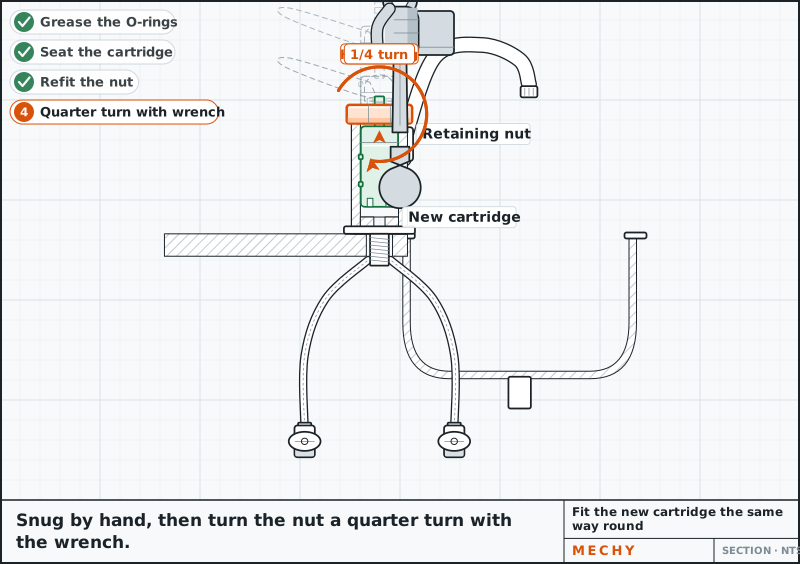
Step 6 of 7
Clean and fit the new part the same way round
Wipe scale and grit out of the faucet body with a rag. Grease the O-rings thinly. Push the new cartridge down facing as before, or fit the new washer and O-ring and screw the stem in. Refit the nut or clip: snug by hand, then up to a quarter turn with the wrench.
Do not overtighten: it cracks the faucet body or makes the handle stiff.
Adjustable wrench, Plumber's grease, Rags and a small bowl
-
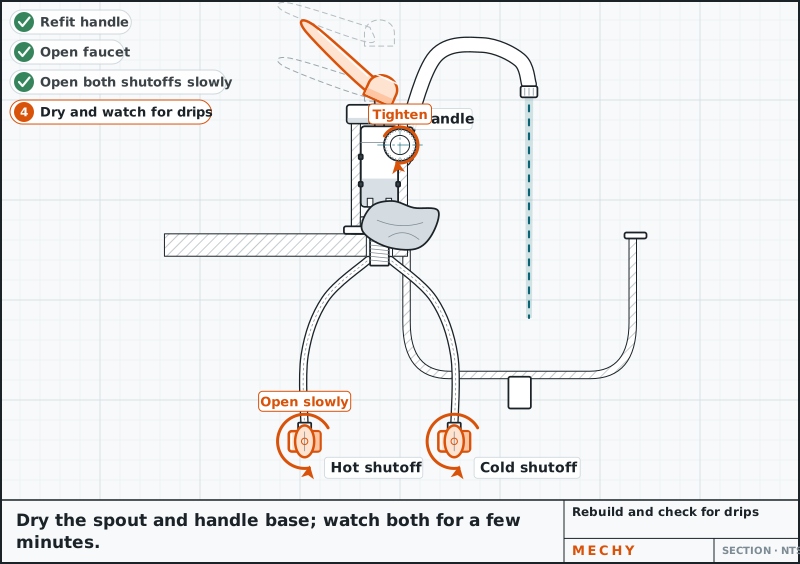
Step 7 of 7
Rebuild, turn water on slowly, check for drips
Refit handle, screw and cap. With the faucet open, open both under-sink valves slowly (counter-clockwise). Let air sputter out, then close the faucet. Dry the spout and handle base; watch both for a few minutes. Look again the next day.
Screwdrivers, Rags and a small bowl


Common mistakes
- Not plugging the drain, so a small screw or clip is lost down it.
- Skipping the shutoff test and opening the faucet with water still on.
- Fitting the cartridge the wrong way round, so hot and cold reverse or it leaks.
- Overtightening the nut, which cracks the body or makes the handle stiff.
- Buying a part by guess instead of taking the old one to match.
Questions
Why is my faucet dripping from the spout?
Usually an inner part has worn out: the cartridge in a one-handle faucet, or the rubber washer in a two-handle one. Mineral scale or a worn seat can also cause it.
How do I know which type of faucet I have?
One handle that stops hard is a cartridge or ceramic disc. Two handles that squeeze shut against a rubber washer are older compression faucets.
Do I need to shut off the water to fix a faucet?
Yes. Close both valves under the sink, then open the faucet to drain it. If a valve will not close, shut the main water valve.
Why does my faucet still drip after a new cartridge?
The part may be the wrong match or fitted wrong way round, or the seat inside may be worn. If it still drips, call a plumber.
Why does my faucet drip for a minute after I turn it off?
Usually grit in the aerator, the screen at the tip of the spout. Unscrew it, soak it in a 50/50 mix of warm water and white vinegar, rinse and refit it. A steady drip all day means the cartridge or washer is worn.
Sources
Updated
Not quite the same? Snap yours.
Mechy looks at your photo and redraws the steps for what you actually have.
First guide free. No sign-up, no card.
Related guides