Home repairs
How to Replace a Shower Head (No Leaks)
- 20 min
- Very easy
- 7 steps
- 4 tools
- 2 parts
Snap yours and Mechy redraws these steps for it. First guide free, no sign-up.
Short answer
Hold the shower arm and unscrew the old head counterclockwise, clean the threads, wrap new thread seal tape clockwise 2 or 3 turns, check the washer, and screw the new head on hand-tight. Turn the water on and check for drips; snug it with a wrench only if it leaks.
Safety first
DIY friendlyDo these before step 1.
- WARNINGMake sure the shower is off. If its valve drips, shut off the water at the main first. Test water away from the spray: hot water scalds.
- NOTICEAlways hold the shower arm (the pipe sticking out of the wall) with one hand so it can't twist inside the wall.
- NOTICEUse a rag between the tool and the head so the metal finish doesn't get scratched.
- NOTICEPut a towel over the drain so a small part can't fall in. Stand steady; wet tubs are slippery.
Stop and call a pro or the dealer if
- Stop if the shower arm turns or wobbles in the wall; call a plumber.
- Stop if you see or suspect a leak inside the wall (wet or stained wall, water behind the plate).
- Stop if the threads on the arm or the head are cracked or badly damaged.
Mechy's guides help, but they don't replace the maker's manual, your training or your site's rules. If something doesn't match what you see, stop and check.
Tools
Tick what you have. In the app, Mechy ticks the ones it can see in your photos.
Parts and supplies
- 1×Fixed shower headFits the standard 1/2 in NPT shower arm thread (the usual size in homes)Check before you buy Size chart
- 1×Rubber washer (usually included in the new head)Flat rubber ring that fits inside the head's threaded inletCheck before you buy Size chart
Steps
-
Step 1 of 7
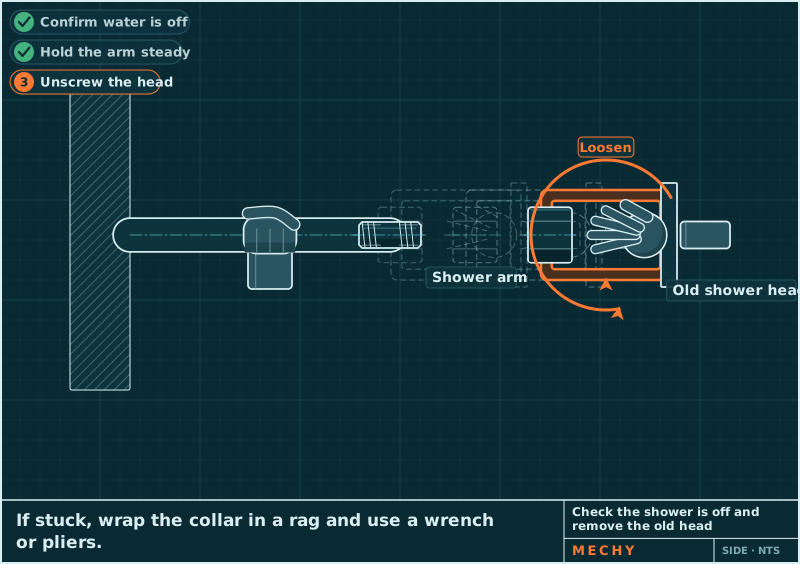
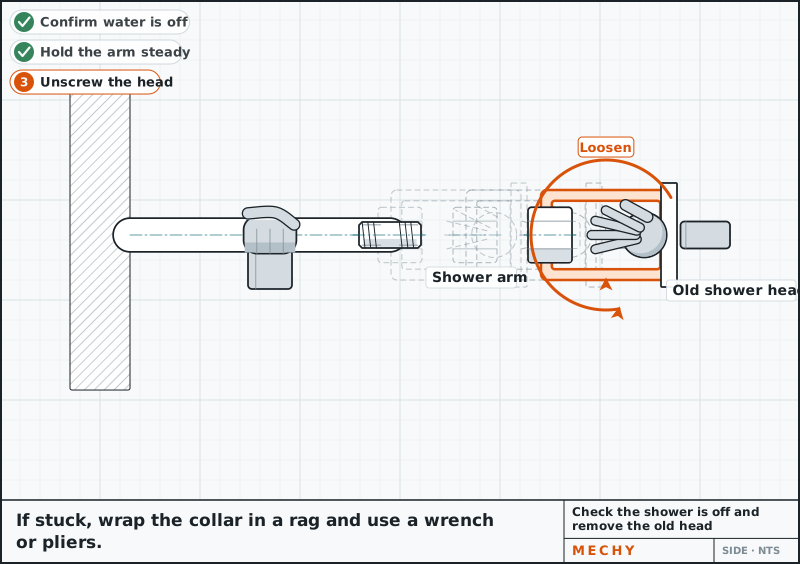
Check the shower is off, then unscrew the old head
Confirm no water is running. Hold the shower arm steady with one hand. Turn the head counterclockwise by hand. If it is stuck, wrap a rag around the head's collar and turn it with the wrench or pliers.
Never let the arm twist in the wall. Keep your other hand firmly on it.
Adjustable wrench or slip-joint pliers, Rag
-
Step 2 of 7
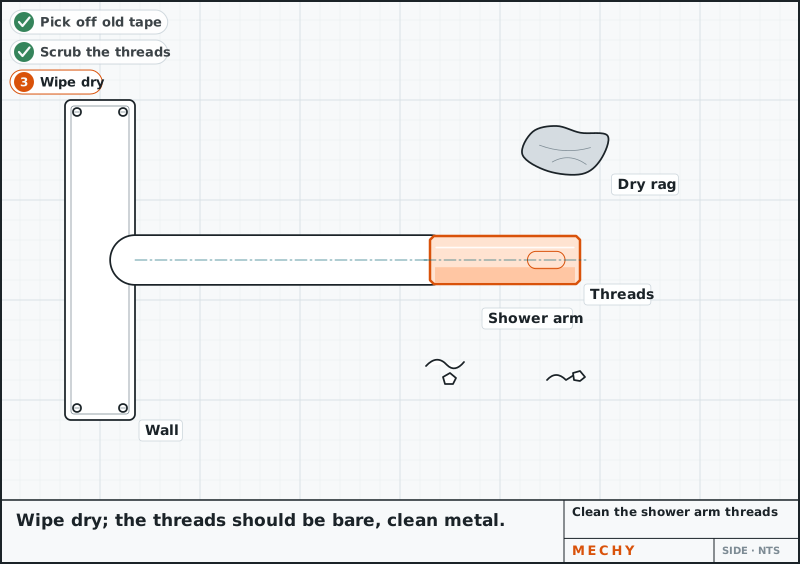
Clean the threads on the arm
Pick off the old tape. Scrub the arm's threads with the old toothbrush to remove mineral scale (white or crusty buildup). Wipe dry with the rag. The threads should look like bare, clean metal.
Old toothbrush, Rag
-
Step 3 of 7
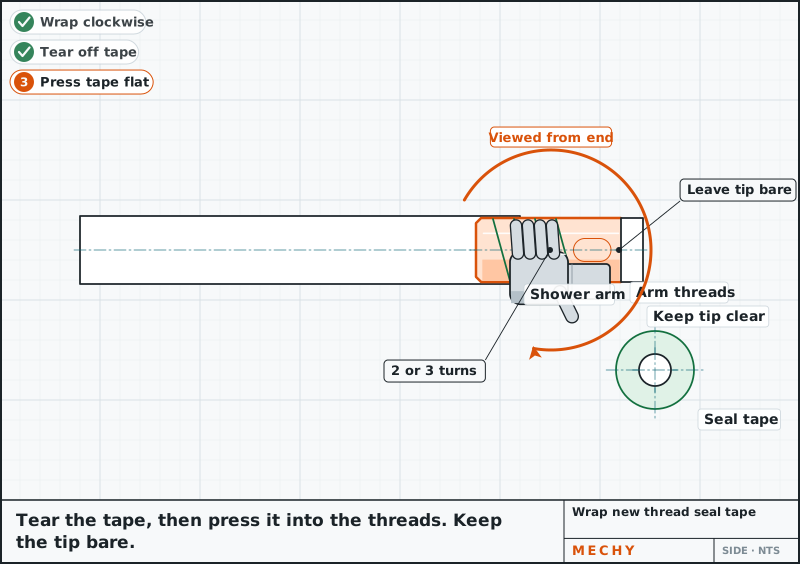
Wrap new thread seal tape
Looking at the arm end-on, wrap the tape clockwise, the way the head screws on. Use 2 or 3 turns, pressing it into the threads. Tear it off. Keep tape off the very tip of the arm so shreds can't clog the head.
Thread seal tape
-
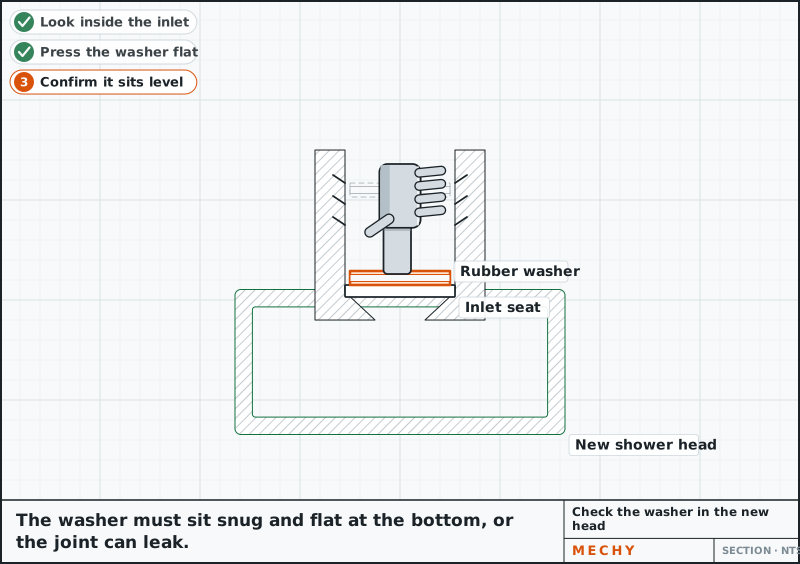
Step 4 of 7
Check the washer in the new head
Look inside the new head's threaded opening. The flat rubber washer must sit snug and flat at the bottom. If it is missing or crooked, press it in. Without it the joint will leak.
-
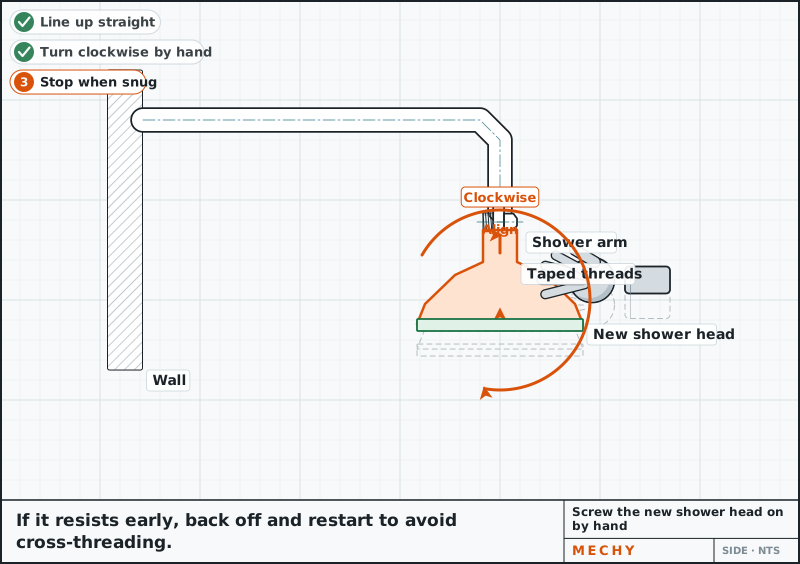
Step 5 of 7
Screw the new head on by hand
Line the head up straight with the arm and turn it clockwise by hand until it stops. If it resists early, back off and restart so you don't cross-thread (cut the threads at an angle).
Don't force it if it feels crooked. Back off and restart.
-
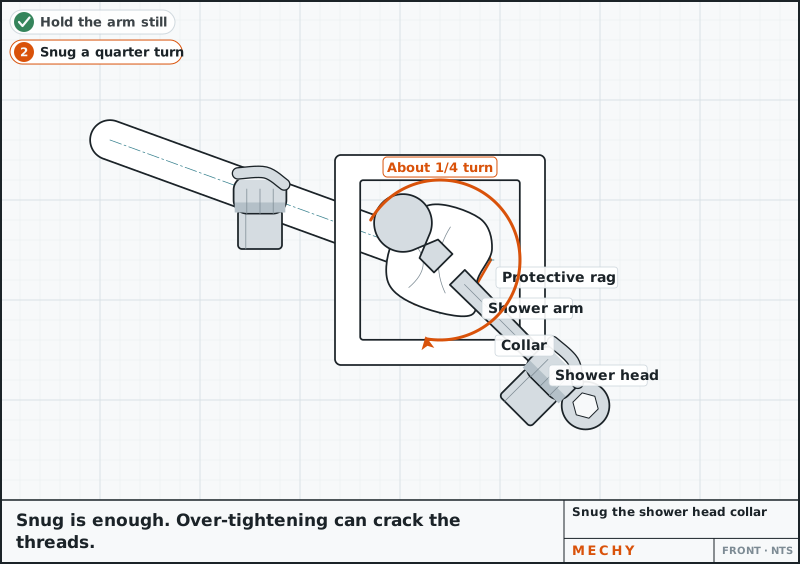
Step 6 of 7
Snug it with the wrench only if needed
Most heads seal hand-tight. If yours is loose or drips in step 7, hold the arm, wrap the rag around the collar and turn it up to a quarter turn more with the wrench. Too much force or too much tape can crack the nut.
Keep holding the arm so it doesn't turn in the wall.
Adjustable wrench or slip-joint pliers, Rag
-
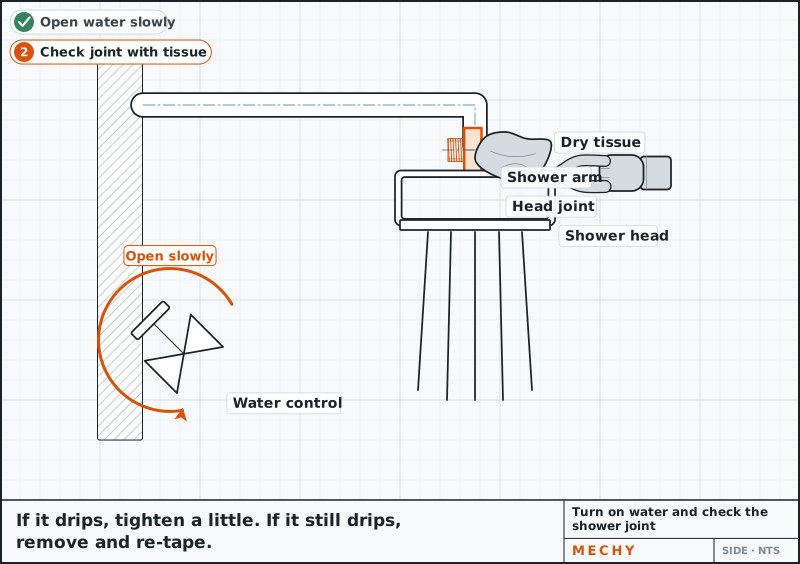
Step 7 of 7
Turn the water on and check for drips
Stand clear of the spray and turn the water on slowly. Watch the joint where head meets arm and run a dry finger or tissue around it. If it drips, tighten a little more; if it still drips, re-tape. Recheck after a few minutes of use.
Rag


Common mistakes
- Letting the shower arm twist in the wall because it wasn't held while turning the head.
- Wrapping the tape counterclockwise so it unwinds as the head goes on.
- Leaving old tape and mineral scale on the threads.
- Forgetting the rubber washer in the new head, or leaving it crooked.
- Over-tightening with a bare wrench, which scratches the finish and can crack the threads.
Questions
Do I need to turn off the water to replace a shower head?
Usually no. Just make sure the shower is off. If the shower valve drips or you are unsure, shut off the water at the nearest shutoff first.
Which way do I unscrew a shower head?
Counterclockwise, as you look at it. Hold the shower arm with your other hand so it doesn't twist inside the wall.
Do I need thread seal tape on a shower head?
It is the usual way to get a drip-free joint. Wrap it clockwise a few turns over clean threads, and make sure the new head's rubber washer is seated.
Why does my new shower head leak at the arm?
Common causes are a missing or crooked washer, too little tape, dirty threads, or a cross-threaded head. Take it off, clean the threads, re-tape and try again.
How tight should a shower head be?
Hand-tight is usually enough. If it drips, tighten a little more with a wrench over a rag, up to about a quarter turn. Too much force or too much tape can crack the nut.
Sources
Updated
Not quite the same? Snap yours.
Mechy looks at your photo and redraws the steps for what you actually have.
First guide free. No sign-up, no card.
Related guides